What makes cookie bars irresistible to you? For me, it’s the combination of gooey chocolate chips and a tender homemade crust, all in an easy to make quick dessert. Rich chocolate and butter come together in these indulgent treats. Save this idea for your next family favorite weeknight dinner dessert.
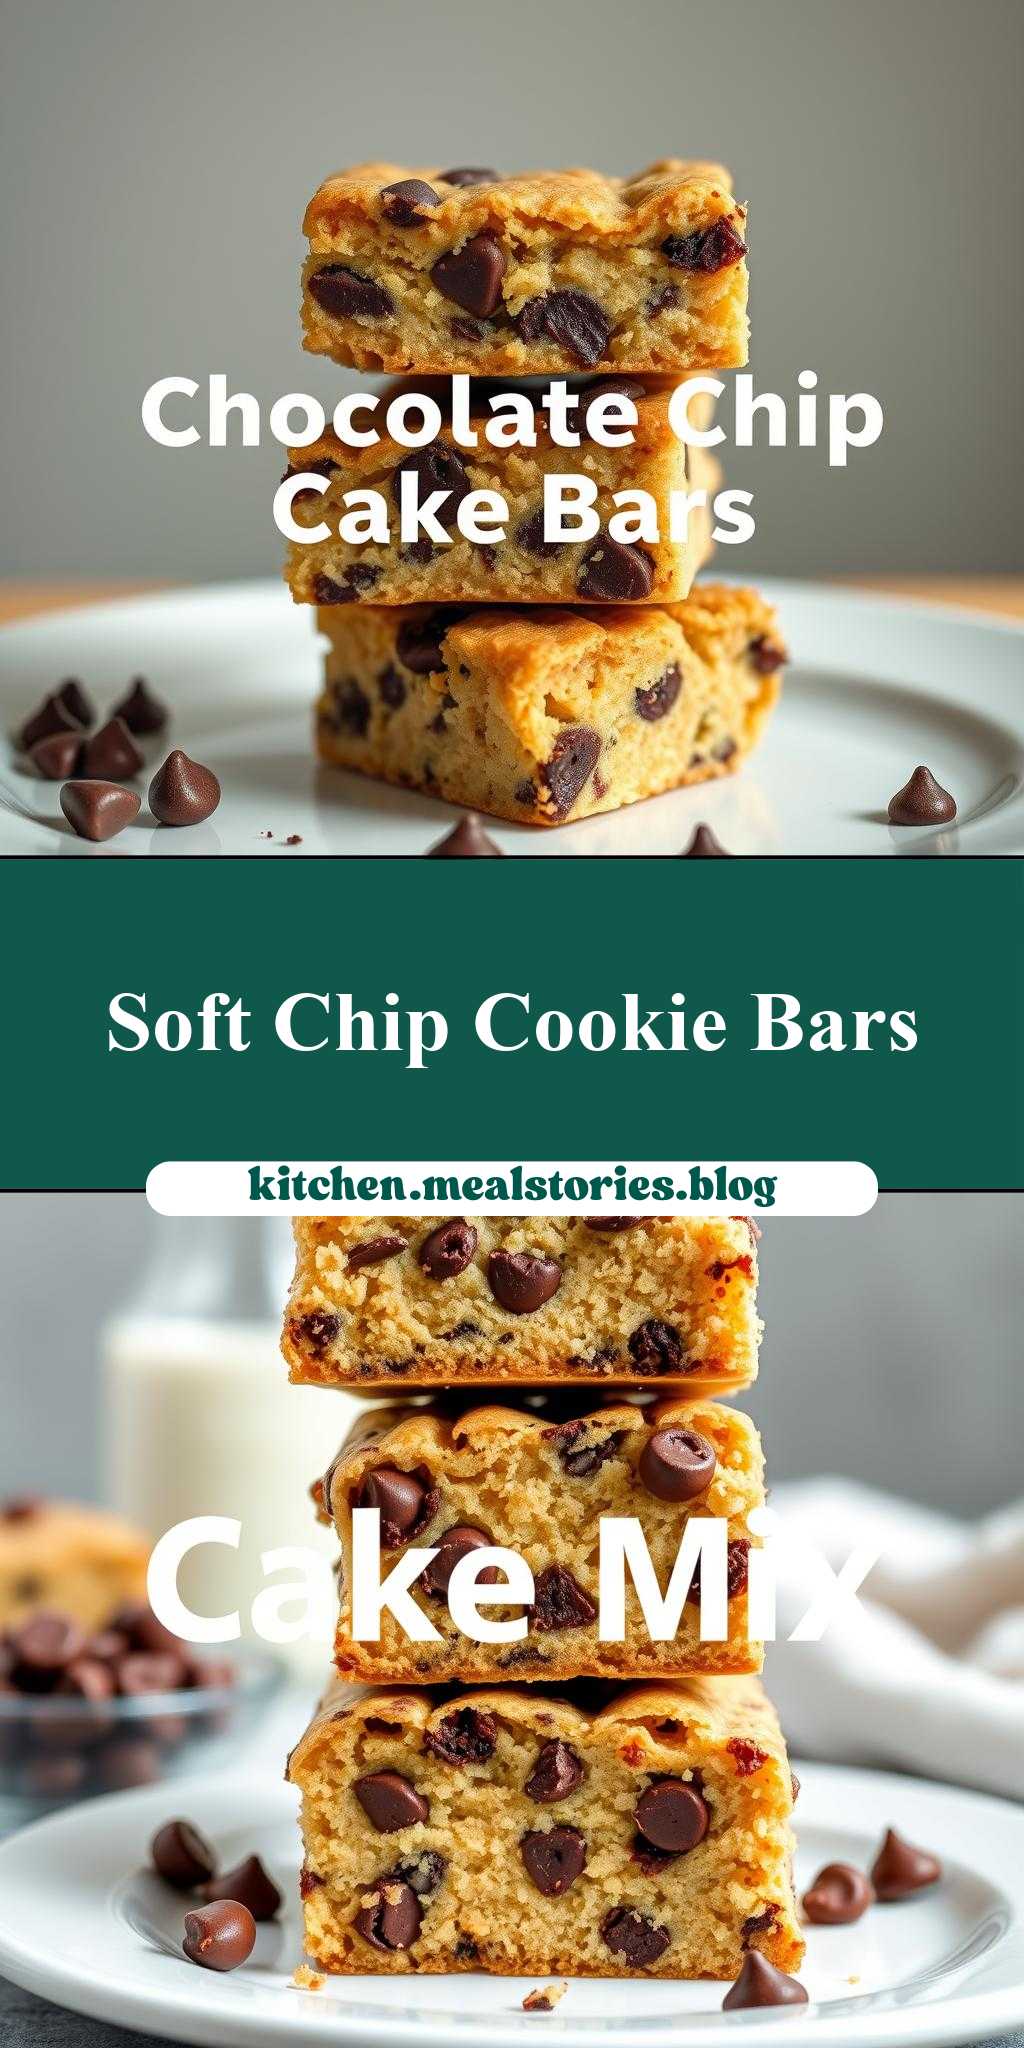
chocolate chip cake mix cookie bars stacked on top of each other with text overlay
Introduction
Imagine a dessert so divine, it’s like a party in your mouth with each bite. The chocolate chip cake mix cookie bars stacked on top of each other with text overlay are not just a treat for the taste buds but also a visual masterpiece. These bars are incredibly easy to make, requiring minimal effort and everyday ingredients, making them perfect for both beginners and seasoned bakers. The combination of the moist cake mix, the crunch of the cookie, and the richness of the chocolate chips creates a flavor balance that’s hard to resist. Plus, the creativity in stacking them and adding a text overlay makes for a presentation that’s as impressive as it is delicious.
Why This Works
- Flavor balance and ingredient accessibility: The use of cake mix as a base ensures that the bars have a consistent flavor and texture, while the addition of chocolate chips and cookies adds layers of flavor and texture, making each bite interesting and satisfying.
- Ease of preparation: The recipe uses a cake mix, which simplifies the process and reduces the number of ingredients needed, making it accessible to both novice and experienced bakers.
- Impressive results with minimal effort: Despite the simplicity of the ingredients and the preparation, the end result is visually stunning and perfect for special occasions or as a unique dessert for any gathering.
Key Ingredients
The main ingredients for these chocolate chip cake mix cookie bars include a box of chocolate cake mix, butter, eggs, semi-sweet chocolate chips, and your favorite type of cookies for the crunch. For practical substitutions, you can use different types of cake mix (though chocolate works best for this recipe), various types of chocolate chips (like milk chocolate or white chocolate for a different flavor profile), and any crunchy cookie that complements the chocolate flavor well, such as peanut butter cookies or oatmeal cookies.
Instructions
- Step 1: Begin by preheating your oven to 350°F (175°C). Prepare a 9×13 inch baking dish by lining it with parchment paper or lightly greasing it with cooking spray. Then, mix the cake mix, melted butter, and eggs in a large bowl until well combined.
- Step 2: Fold in the chocolate chips to distribute them evenly throughout the batter. Pour half of the batter into the prepared baking dish and bake for about 20 minutes or until the edges start to set.
- Step 3: While the first layer is baking, prepare your cookie layer. Crush your chosen cookies in a bowl. Once the first layer of cake mix is ready, sprinkle the crushed cookies over the top, followed by the remaining cake mix. Return to the oven and bake for an additional 20-25 minutes or until a toothpick inserted comes out clean.
- Step 4: Allow the bars to cool completely in the pan before cutting into them. For the stacked effect, cut the cooled bars into desired shapes or squares, then stack them on top of each other. You can use frosting or melted chocolate to “glue” the layers together if needed. Finally, add your text overlay using frosting or chocolate sauce to complete the look.
Handy Tips
- To ensure your bars are moist, don’t overbake them. The top should be lightly golden, and a toothpick inserted into the center should come out with a few moist crumbs attached.
- For an extra crunchy cookie layer, bake the crushed cookies in the oven for a few minutes before adding them to the bars. Keep an eye on them to prevent burning.
- Experiment with different types of cookies and cake mixes to find your favorite combination. This recipe is highly adaptable, so don’t be afraid to get creative!
Heat Control
When baking the bars, it’s crucial to maintain the right temperature and baking time. The oven should be preheated to 350°F (175°C), and the baking time will depend on the thickness of the layers and your oven’s performance. Generally, the first layer takes about 20 minutes, and the entire bar takes about 40-45 minutes to bake through. Keep an eye on the bars after 30 minutes, as oven times can vary. The bars are done when the edges are set, and the center is just slightly tender to the touch.
Crunch Factor
The crunch in these bars comes from the cookie layer. To achieve the perfect crunch, make sure not to overbake the cookies when you’re preparing them for the layer. A light bake or even just crushing them and adding them raw can provide the right amount of texture contrast to the soft cake mix. Keep in mind, the type of cookie you choose will also affect the crunch factor, with some cookies providing a more pronounced crunch than others.
Pro Kitchen Tricks
- For easier cutting and stacking, chill the bars in the refrigerator for about 30 minutes before cutting. This will help them hold their shape better.
- To add an extra layer of flavor, drizzle the tops of the bars with melted chocolate or caramel sauce before serving.
- Consider using a cookie stamp or a small cookie cutter to cut out the cookies for the middle layer, adding a fun and personalized touch to your bars.
Storage Tips
- These bars can be stored in an airtight container at room temperature for up to 5 days. For longer storage, consider freezing them. Wrap the bars tightly in plastic wrap or aluminum foil and place them in a freezer-safe bag. Frozen bars can be stored for up to 2 months.
- When reheating, simply thaw the bars overnight in the fridge or reheat them in the microwave for a few seconds. Be cautious not to overheat, as this can cause the chocolate to melt unevenly.
- For the best flavor and texture, consume the bars within a few days of baking. However, they remain delicious even after freezing and reheating.
Gift Packaging Ideas
These chocolate chip cake mix cookie bars are perfect for gifting, especially with their stacked and decorated presentation. Consider packaging them in decorative tins, jars, or boxes. You can wrap each bar individually in parchment paper or cellophane and then place them in a larger gift container. Add a personal touch with a ribbon or a gift tag, and don’t forget to include a card with the recipe or baking instructions if the recipient wants to make them again.
Flavor Variations
- Different spices: Add a pinch of cinnamon, nutmeg, or cayenne pepper to the cake mix for a unique twist.
- Creative toppings: Instead of just chocolate chips, try adding nuts (walnuts, pecans), dried fruits (cranberries, cherries), or even candy pieces (M&M’s, chopped peanut butter cups) to the batter.
- Ingredient swaps: Use different types of milk (almond, soy) or substitute some of the butter with applesauce for a lighter version. You can also experiment with gluten-free cake mixes for a gluten-free option.
Troubleshooting
- Texture problems: If the bars turn out too dense, it might be due to overmixing the batter. Try mixing the ingredients just until they come together for a lighter texture.
- Ingredient replacements: If you’re out of a specific ingredient, look for substitutions in the recipe. For example, you can use water instead of milk in a pinch, though the flavor might be slightly affected.
- Over/undercooking signs: Keep an eye on the bars while they’re baking. If the edges start to brown too quickly, cover the top with foil to prevent overbrowning. Undercooked bars will be soft and squishy to the touch; give them a few more minutes in the oven and check again.
FAQs
- Can I freeze it? Yes, these bars can be frozen for up to 2 months. Wrap them tightly and place them in a freezer-safe bag.
- Is it gluten-free? The recipe uses a traditional cake mix, which contains gluten. However, you can substitute it with a gluten-free cake mix for a gluten-free version.
- Can I double the recipe? Yes, you can double the recipe to make a larger batch. Just ensure you have a large enough baking dish to accommodate the increased volume.
Conclusion
Making these chocolate chip cake mix cookie bars is a fun and rewarding baking experience that yields delicious results with minimal fuss. Whether you’re a seasoned baker or just starting out, this recipe is perfect for anyone looking to impress with a unique dessert. Don’t be afraid to experiment with different flavors and presentations to make the recipe your own. Share your creations with friends and family, and enjoy the joy of baking and sharing delicious treats with others. Happy baking!