What’s the secret to a show-stopping dessert with minimal effort? This oreo icebox cake is a quick and easy homemade treat that combines creamy filling and chocolate cookies for a decadent family favorite. Save this idea for your next weeknight dinner party and try it soon
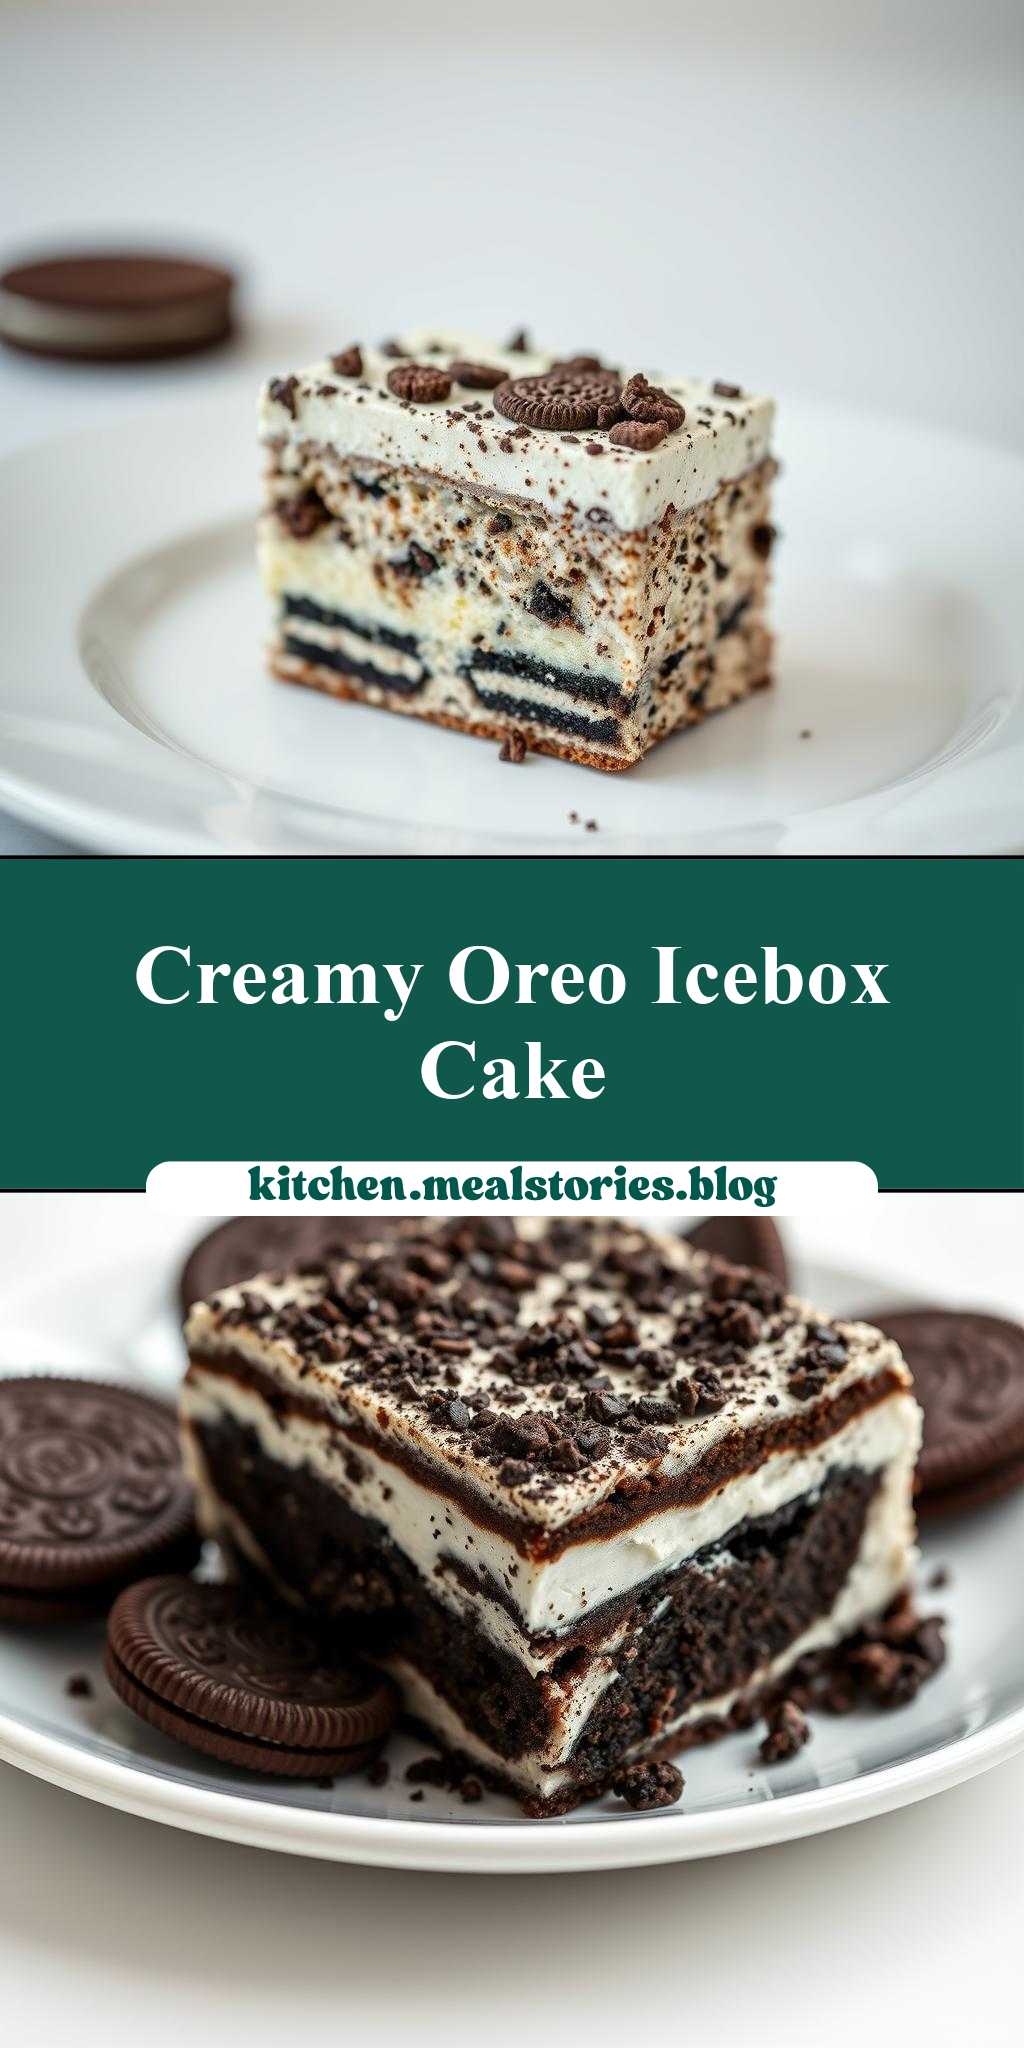
oreo icebox cake on a white plate
Introduction
Imagine a dessert so divine, it’s as if you’ve stepped into a world of creamy textures and crunchy delights, all without the need for baking. The Oreo icebox cake is a masterpiece of simplicity, requiring only a handful of ingredients and minimal preparation time. This no-bake wonder is perfect for hot summer days when the thought of turning on the oven is unbearable, or for those times when you need a quick dessert that still manages to impress. With its layers of Oreo cookies, creamy filling, and chilled to perfection texture, this cake is a true showstopper that will leave your family and friends in awe.
Why This Works
- The balance of flavors between the bitter notes of the Oreo cookies and the sweetness of the cream provides a delightful taste experience that is neither too rich nor too bland.
- The accessibility of the ingredients makes this dessert a staple for any household, as you likely have most of what you need right in your pantry and fridge.
- The ease of preparation is perhaps the most appealing aspect, as it requires no cooking skills whatsoever, making it a perfect project for beginners or for those looking to spend less time in the kitchen.
- Despite its simplicity, the Oreo icebox cake presents impressively, especially when served on a pristine white plate, making it a great option for dinner parties or special occasions.
Key Ingredients
The main ingredients for this recipe include a package of Oreo cookies, a can of condensed milk, a package of cream cheese, and a container of whipped cream. For those looking for substitutions, you can use other types of cookies, though Oreos provide a unique flavor and texture that’s hard to replicate. Additionally, if you’re looking to reduce the calorie count, you can opt for lower-fat versions of the cream cheese and whipped cream. However, it’s worth noting that these substitutions might slightly alter the taste and texture of the final product.
Instructions
- Step 1: Begin by preparing your ingredients. This includes opening your package of Oreos and separating the cookies from the cream filling, softening your cream cheese to room temperature, and chilling your whipped cream in the fridge until you’re ready to use it.
- Step 2: In a large mixing bowl, combine your softened cream cheese with the can of condensed milk. Mix until smooth and creamy, ensuring there are no lumps. This will form the base of your creamy filling.
- Step 3: To assemble the cake, start with a layer of Oreo cookies at the bottom of your serving dish. You can trim the cookies to fit the dish if necessary. Next, spread a layer of the cream cheese mixture over the cookies, followed by a layer of whipped cream. Repeat this process until you’ve used up all your ingredients, ending with a layer of whipped cream on top.
- Step 4: Place the cake in the refrigerator to chill for at least 4 hours or overnight. This step is crucial as it allows the flavors to meld together and the textures to set. Once chilled, your Oreo icebox cake is ready to be served. Simply slice it into portions and serve on a white plate for a beautifully presented dessert.
Handy Tips
- One of the most helpful tips for making this cake is to ensure that each layer is evenly spread and that the cake is chilled long enough. This prevents the layers from mixing together and ensures a clean slice when serving.
- Another tip is to not overmix the cream cheese and condensed milk mixture, as this can result in a too dense and less creamy filling.
- For those looking for variations, consider adding a sprinkle of cinnamon or cocoa powder on top of the whipped cream for an extra layer of flavor and visual appeal.
Heat Control
Since this is a no-bake recipe, heat control is not a concern. However, it’s essential to keep the cake refrigerated at a temperature of 40°F (4°C) or below to prevent spoilage and ensure food safety.
Crunch Factor
The crunch factor in this dessert comes from the Oreo cookies, which provide a nice textural contrast to the creamy filling and whipped cream. To maintain this crunch, it’s best to assemble the cake just before chilling it in the fridge, and to serve it promptly after removing it from the refrigerator.
Pro Kitchen Tricks
- A professional trick for making this cake look more appealing is to pipe additional whipped cream on top in decorative patterns or to sprinkle crushed Oreo cookies around the edges of the plate for a pop of color and texture.
- For cleanup, having a bowl of warm soapy water ready to go can make quick work of washing the mixing bowls and utensils used in preparation.
Storage Tips
- The Oreo icebox cake can be stored in the refrigerator for up to 3 days. It’s best to keep it covered with plastic wrap or aluminum foil to prevent it from drying out.
- For longer storage, consider freezing the cake. However, it’s best to freeze it without the whipped cream topping, as whipped cream does not freeze well. Simply thaw the cake in the fridge overnight and top with fresh whipped cream before serving.
Gift Packaging Ideas
If you’re looking to give the Oreo icebox cake as a gift, consider packaging it in a decorative tin or glass dish covered with plastic wrap or a lid. You can also add a ribbon around the dish for a more personalized touch. For a more rustic look, a mason jar with a layer of cake, topped with whipped cream and a sprinkle of Oreo crumbs, can make for a charming and unique gift.
Flavor Variations
- For a minty twist, you can add a few drops of peppermint extract to the cream cheese mixture or sprinkle crushed candy canes on top of the whipped cream.
- Another variation is to use different types of cookies, such as peanut butter cookies or chocolate sandwich cookies, to change up the flavor profile.
- Adding a layer of fresh fruit, such as strawberries or blueberries, can also provide a refreshing and lighter twist on the classic recipe.
Troubleshooting
- If your cake turns out too runny, it may be due to not chilling it long enough or using too much condensed milk. The solution is to refrigerate it for a few more hours or to add more cream cheese to balance out the filling.
- If the layers start to mix together, it could be because the cake was not chilled properly or because the layers were not spread evenly. To prevent this, make sure to chill the cake as directed and take your time when assembling the layers.
FAQs
- Can I freeze it? Yes, you can freeze the Oreo icebox cake, but it’s best to do so without the whipped cream topping. Simply thaw in the fridge overnight and top with fresh whipped cream before serving.
- Is it gluten-free? Depending on the type of cookies used, this cake can be gluten-free. However, traditional Oreo cookies contain gluten, so if you’re looking for a gluten-free option, consider using gluten-free cookies instead.
- Can I double the recipe? Yes, you can easily double or triple the recipe if you’re serving a larger crowd. Just keep in mind that you’ll need a larger serving dish and possibly more chilling time to ensure the cake sets properly.
Conclusion
In conclusion, the Oreo icebox cake is a versatile, easy-to-make dessert that is perfect for any occasion. With its simple ingredients, minimal preparation time, and impressive presentation, it’s a recipe that’s sure to become a favorite. Whether you’re a seasoned baker or a beginner in the kitchen, this no-bake cake is a great option for those looking to create something delicious without the hassle of cooking. So go ahead, give it a try, and enjoy the delightful combination of crunchy cookies and creamy filling that this cake has to offer.