What makes the perfect dessert even better, a crunchy twist like oreo cookies on top of a moist homemade cake. This easy to make treat is ideal for a weeknight dinner and features a simple yet effective cooking method of baking. Save this idea for your next family favorite dessert.
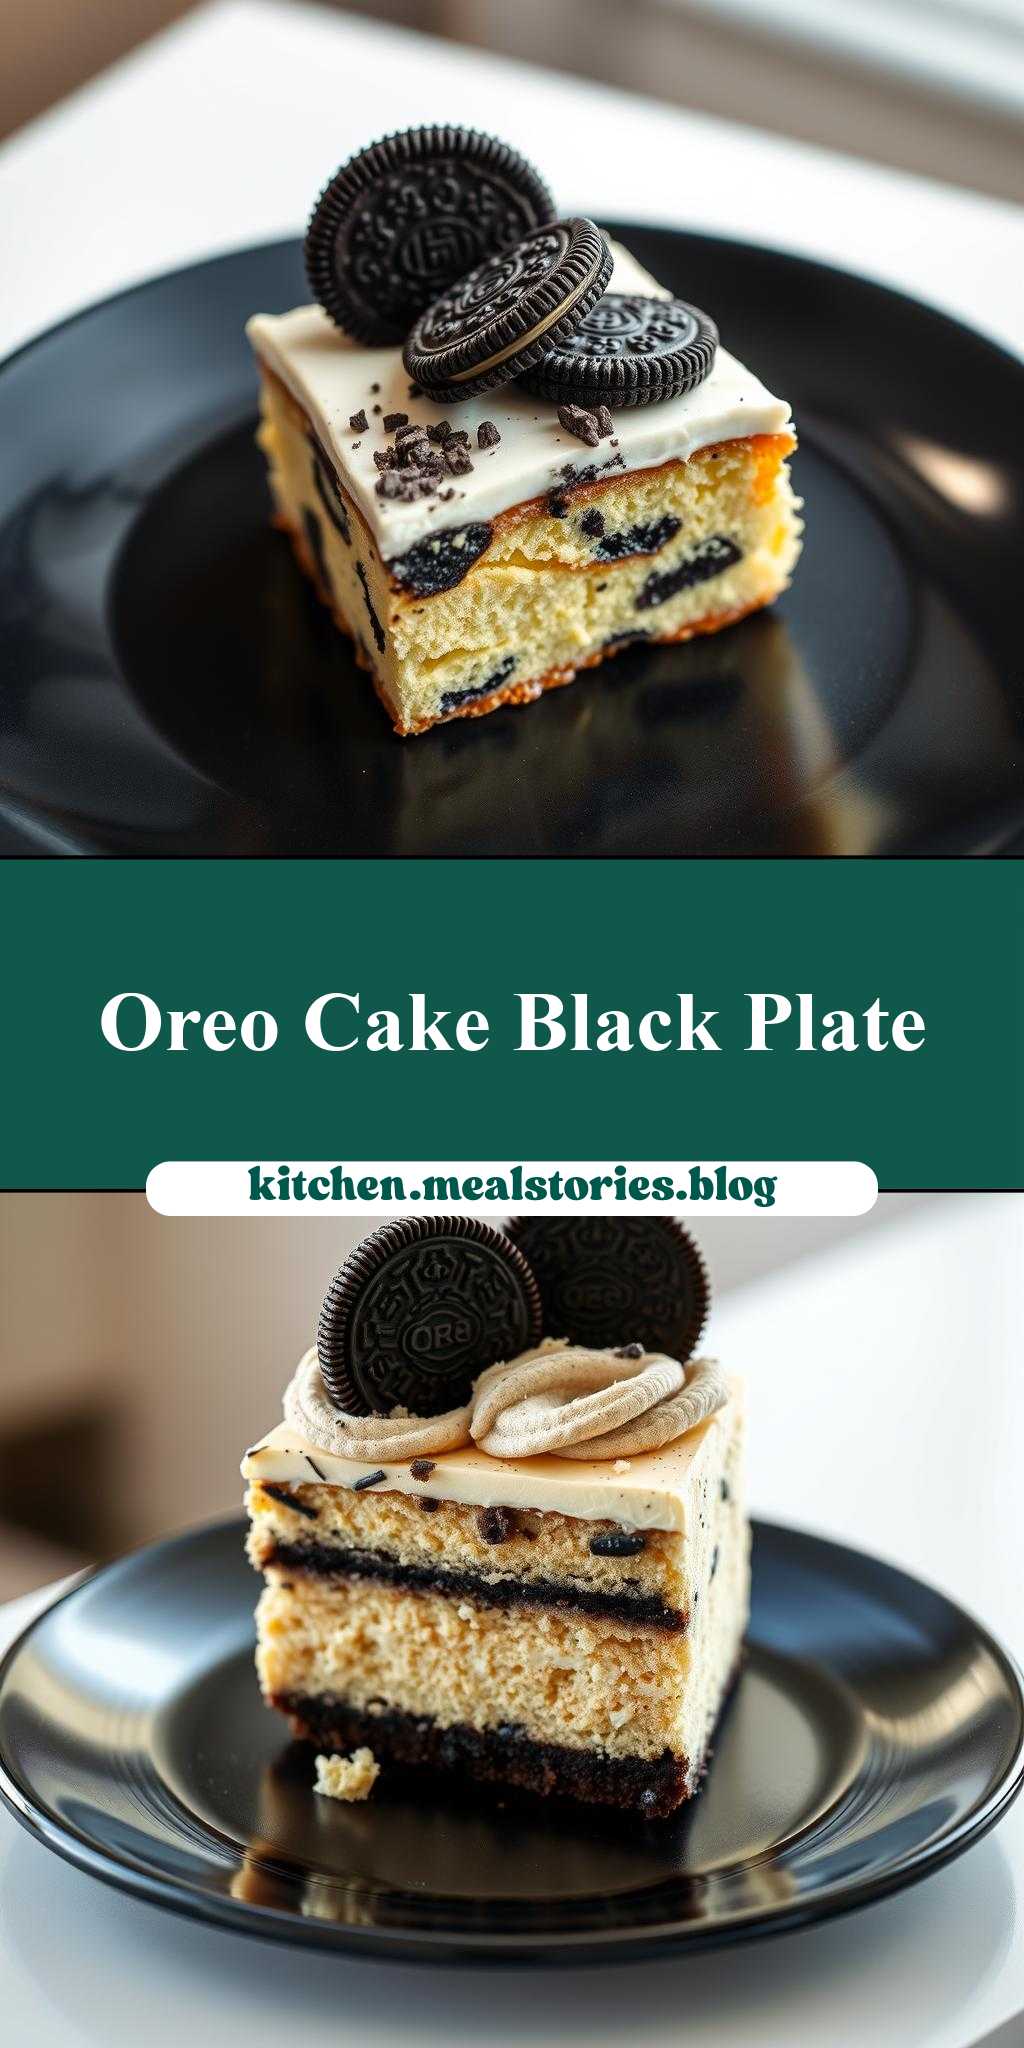
a piece of cake with oreo cookies on top is sitting on a black plate
Introduction
This delectable dessert is a masterclass in simplicity and creativity, combining the richness of cake with the unmistakable crunch of Oreo cookies, all presented elegantly on a black plate. The beauty of this recipe lies in its accessibility, requiring only everyday ingredients that most of us have in our pantries. It’s a testament to how a few quality ingredients can come together to create something truly special. Whether you’re a seasoned baker or just starting your culinary journey, this cake is sure to impress with its ease of preparation and the impressive results it yields. The combination of moist cake and the distinctive flavor of Oreos offers a delightful contrast of textures and tastes that will leave everyone wanting more.
Why This Works
- Flavor balance and ingredient accessibility: The cake provides a moist and fluffy base, while the Oreo cookies add a nice crunch and their signature flavor, creating a perfect balance of textures and tastes. All the ingredients are easily found in most supermarkets, making this recipe highly accessible.
- Ease of preparation: The steps involved in making this cake are straightforward and simple, requiring minimal effort and time. This makes it an ideal choice for both beginners and experienced bakers looking for a quick yet impressive dessert.
- Impressive results with minimal effort: Despite its simplicity, the presentation of the cake, especially when topped with Oreo cookies and served on a black plate, is visually stunning. It’s perfect for special occasions or as a centerpiece for any dessert table.
Key Ingredients
The main ingredients for this recipe include a moist vanilla or chocolate cake mix (depending on your preference), Oreo cookies for the topping, and any additional decorations you might want, such as frosting or sprinkles. For the cake, you’ll also need the usual suspects: eggs, oil, and water, as per the box instructions. If you want to get creative, you could also use different flavors of cake mix or types of cookies to change up the flavor profile. Practical substitutions could include using gluten-free cake mix for those with dietary restrictions or choosing different types of cookies for varying flavors.
Instructions
- Step 1: Begin by preparing your cake according to the box instructions. This typically involves mixing the cake mix with eggs, oil, and water in a large bowl until well combined. Ensure you follow the instructions for the right consistency and don’t overmix.
- Step 2: Pour the cake batter into a greased cake pan and bake in a preheated oven as directed on the cake mix box. Keep an eye on the cake to ensure it doesn’t overcook; a toothpick inserted into the center should come out clean.
- Step 3: Once the cake is baked and cooled, you can start decorating. If desired, frost the top of the cake with your favorite frosting to act as a glue for the Oreos. Then, place Oreo cookies on top of the cake. You can arrange them in a pattern or simply place them randomly, depending on your preference.
- Step 4: Final touches might include adding more frosting around the Oreos or using sprinkles to match the occasion. Place the cake on a black plate to serve, which will provide a sleek background that makes the cake and Oreos pop visually.
Handy Tips
- One of the most helpful tips for this recipe is to not overbake the cake. A moist cake is key to this dessert’s success. Also, consider using a turntable to display your cake, as this can add to the visual appeal, especially if you’re presenting it at a party or gathering.
Heat Control
If you’re baking the cake from scratch or using a mix, the ideal temperature and baking time will be provided on the box or in your recipe. Generally, cakes are baked at around 350°F (175°C). The timing can vary depending on the size of your cake and your oven’s performance, so keep an eye on it. Signs of doneness include the cake pulling away from the sides of the pan, a toothpick coming out clean when inserted into the center, and the top being firm to the touch.
Crunch Factor
The crunch in this dessert comes from the Oreo cookies on top. To maintain their crunch, it’s best to add them just before serving. If you’re using a frosting to stick the Oreos to the cake, apply a small amount to the bottom of each cookie to secure it without covering the entire surface, which can make the cookies soggy.
Pro Kitchen Tricks
- A pro tip for achieving a professional finish is to chill your cake in the refrigerator for about 10 minutes before decorating. This firms up the cake and makes it easier to handle and frost smoothly. Additionally, using a serrated knife to level your cake (if necessary) and ensure it’s even can make a big difference in the final presentation.
Storage Tips
- If you’re not serving the cake immediately, it can be stored in an airtight container at room temperature for up to 3 days. If you’ve frosted the cake, it’s best to store it in the refrigerator to prevent the frosting from melting or becoming too soft. For longer storage, consider freezing the cake without the Oreos and then thawing and decorating when needed.
Gift Packaging Ideas
This cake makes a wonderful gift, especially for birthdays or as a thank-you gesture. Consider placing the cake on a decorative plate or cake stand, and then wrapping the entire thing in clear plastic wrap or a large cellophane bag. You could also add a ribbon around the plate or a gift card with a personal message to make it extra special.
Flavor Variations
- Different spices: You could add a pinch of salt or a teaspoon of vanilla extract to the cake batter for extra depth of flavor.
- Creative toppings: Instead of Oreos, consider using other types of cookies, like chocolate chip or peanut butter cookies, for a different twist.
- Ingredient swaps: For a gluten-free version, use a gluten-free cake mix. You could also experiment with different types of milk or substitute the oil with melted butter for a richer flavor.
Troubleshooting
- Texture problems: If your cake turns out too dense, it might be due to overmixing the batter. Try to mix your ingredients just until they come together for a lighter texture.
- Ingredient replacements: If you’re out of a specific ingredient, look for substitutions online. For example, if you don’t have buttermilk, you can make a substitute by mixing milk with vinegar or lemon juice.
- Over/undercooking signs: Keep an eye on your cake while it’s baking. If it’s undercooked, it will be soggy in the center. If it’s overcooked, it will be dry and possibly cracked on top.
FAQs
- Can I freeze it? Yes, you can freeze the cake before decorating. It’s best to freeze it without the Oreos and then thaw and decorate when you’re ready to serve.
- Is it gluten-free? This depends on the cake mix you use. If you use a gluten-free mix, then yes, the cake will be gluten-free. Otherwise, it will contain gluten.
- Can I double the recipe? Yes, you can easily double the recipe to make a larger cake. Just ensure you have enough Oreos for the top and adjust the baking time accordingly, as a larger cake will take longer to cook through.
Conclusion
Making a piece of cake with Oreo cookies on top is a fun and rewarding baking project that’s perfect for any occasion. With its ease of preparation, impressive presentation, and delicious flavor, it’s sure to become a favorite. Don’t be afraid to experiment with different flavors and decorations to make it your own. Whether you’re baking for a crowd or just a special someone, this cake is sure to bring a smile to everyone’s face. So go ahead, get baking, and enjoy the process of creating something truly special!