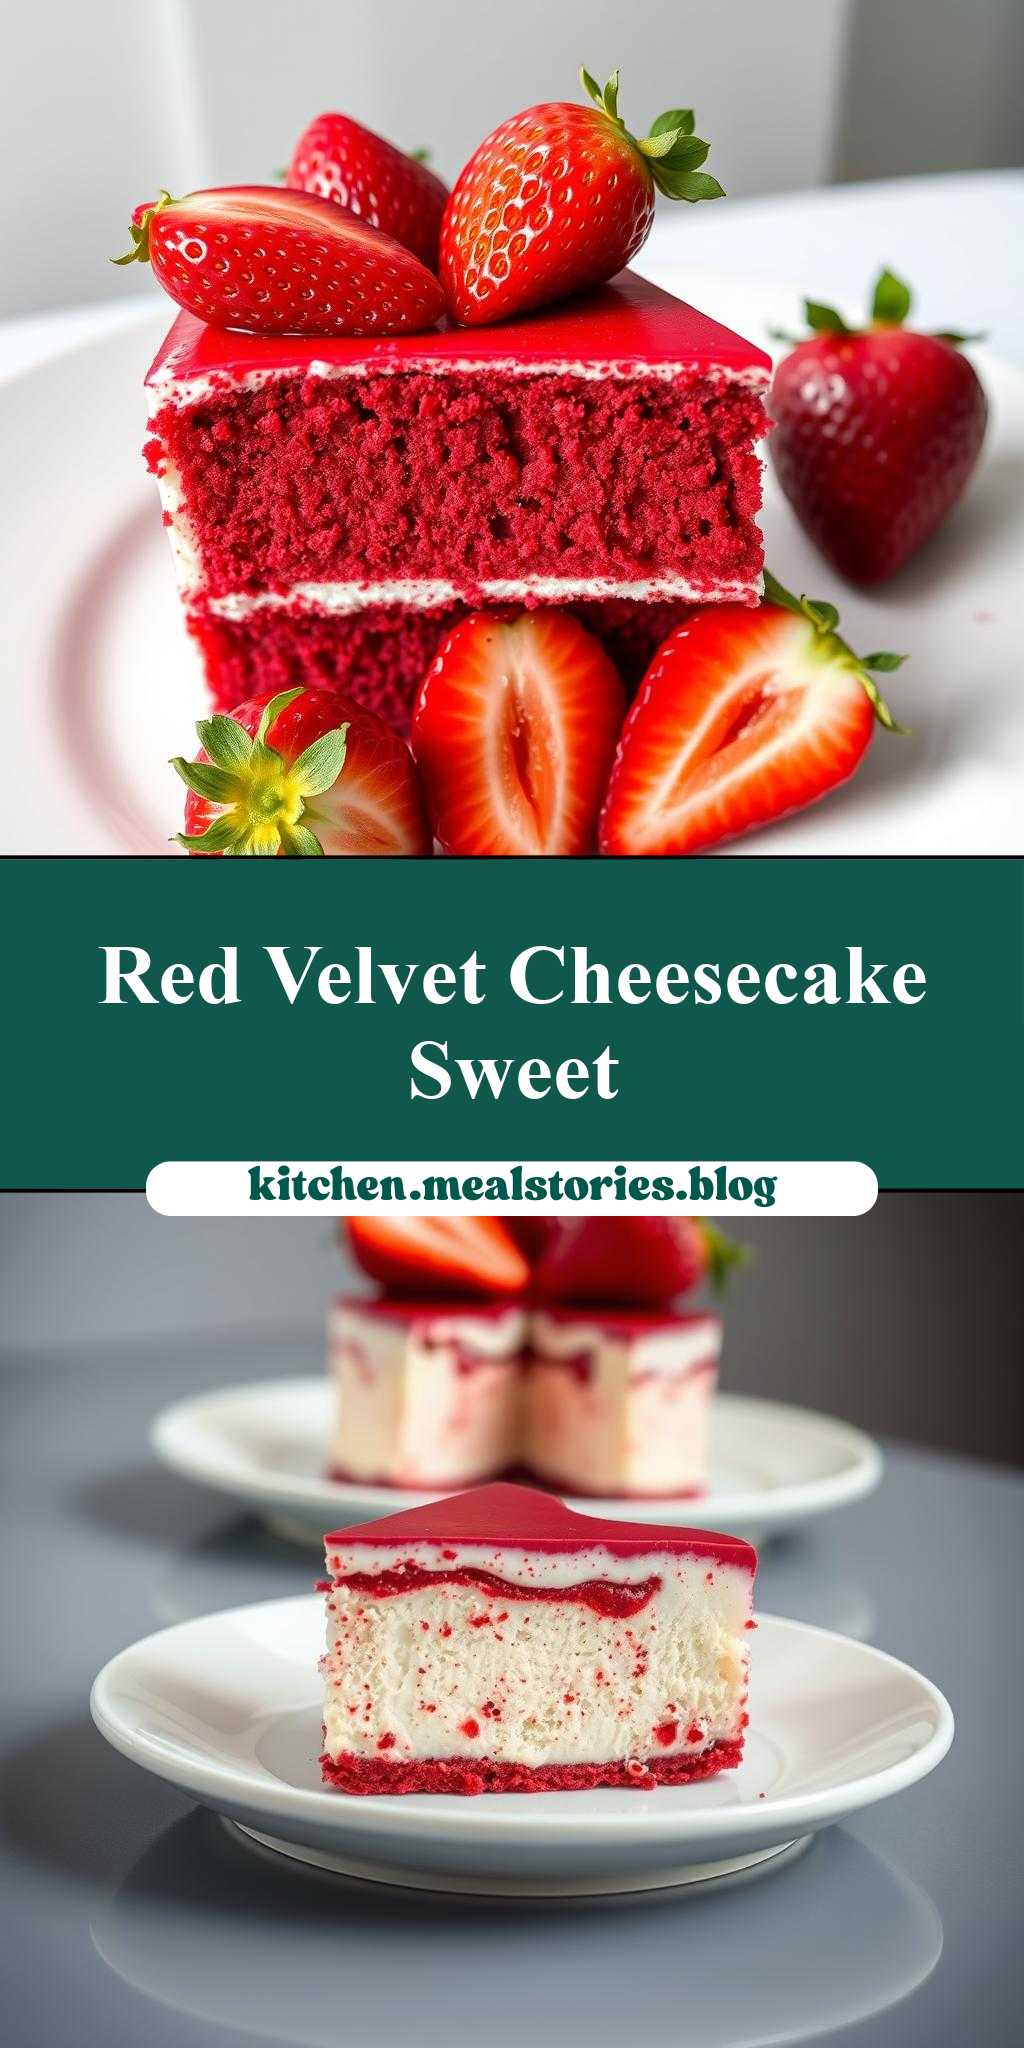
What makes a red velvet cheesecake truly unforgettable? A delicate balance of tangy cream cheese and sweet strawberries, all wrapped up in a moist homemade crust, perfect for a quick and easy weeknight dessert – Save this idea
two pictures of a red velvet cheesecake with strawberries on the top and bottom
Introduction
Imagine a dessert so divine, it’s almost too beautiful to eat. The red velvet cheesecake with strawberries on the top and bottom is not just a treat for the taste buds, but a feast for the eyes. This stunning dessert combines the rich flavors of red velvet cake with the creamy smoothness of cheesecake, all topped with a vibrant arrangement of fresh strawberries. The best part? It’s easier to make than you think, using everyday ingredients that you might already have in your pantry. Whether you’re a seasoned baker or a beginner in the kitchen, this recipe is sure to impress your family and friends with its ease, flavor, and creativity.
Why This Works
- Flavor balance and ingredient accessibility: The combination of red velvet and cheesecake provides a perfect balance of flavors, while the use of common ingredients makes it accessible to everyone.
- Ease of preparation: Despite its impressive appearance, this dessert is relatively easy to prepare, requiring minimal special equipment or techniques.
- Impressive results with minimal effort: The layering of the cheesecake, red velvet cake, and strawberries creates a visually stunning effect that’s sure to impress, all without requiring hours of intricate decoration.
Key Ingredients
To make this show-stopping dessert, you’ll need a few key ingredients. For the cheesecake, you’ll need cream cheese, eggs, sugar, and vanilla extract. For the red velvet cake, you’ll need flour, sugar, cocoa powder, and food coloring. And of course, no red velvet cheesecake would be complete without a generous helping of fresh strawberries. Practical substitutions can be made for some ingredients, such as using gluten-free flour for those with dietary restrictions or substituting the strawberries with other berries for a different flavor profile.
Instructions
- Step 1: Begin by preheating your oven to 350°F (175°C). While the oven is warming up, prepare your ingredients by chopping the strawberries, measuring out the flour and sugar, and beating the cream cheese until it’s smooth.
- Step 2: Cook the red velvet cake according to your recipe, either from scratch or using a mix. Once the cake is done, let it cool completely before using it as the base of your cheesecake.
- Step 3: Layer the flavors and textures of your cheesecake by spreading a layer of cheesecake batter over the cooled red velvet cake, followed by a layer of sliced strawberries. Repeat this process until you’ve used up all of your ingredients, finishing with a layer of cheesecake batter on top.
- Step 4: Finally, add the finishing touches to your cheesecake by arranging a pattern of sliced strawberries on top. You can use a simple pattern of concentric circles or get creative with a more intricate design. Once your cheesecake is decorated, it’s ready to serve and enjoy!
Handy Tips
- One of the most helpful tips for making this dessert is to make sure your ingredients are at room temperature before you start. This will help ensure that your cheesecake batter is smooth and even, and that your cake cooks consistently.
- Another tip is to not overmix your batter, as this can cause your cheesecake to crack or your cake to become tough. Instead, mix your ingredients just until they’re combined, then stop mixing and let the batter rest.
- Finally, be sure to let your cheesecake cool completely before serving, as this will help it set and make it easier to slice. You can speed up the cooling process by placing the cheesecake in the refrigerator or by using a cooling rack to improve airflow.
Heat Control
If you’re using a water bath to cook your cheesecake, it’s especially important to control the heat. The ideal temperature for cooking a cheesecake is between 325°F (165°C) and 350°F (175°C), with a cooking time of about 45-60 minutes. You can check for doneness by gently jiggling the pan – if the cheesecake is set, it should be firm and only slightly jiggly in the center.
Crunch Factor
The crunch factor of this dessert comes from the fresh strawberries on top, which provide a sweet and tangy contrast to the smooth cheesecake and moist cake. To achieve the perfect crunch, be sure to slice your strawberries just before serving, as this will help them retain their texture and flavor. You can also add other crunchy elements, such as chopped nuts or cookie crumbs, to the top of your cheesecake for added texture and interest.
Pro Kitchen Tricks
- One pro kitchen trick for making this dessert is to use a water bath to cook the cheesecake. This helps to cook the cheesecake evenly and prevents it from cracking or burning.
- Another trick is to use a high-quality food coloring to achieve the perfect red velvet color. Look for a gel or paste-based coloring, as these will give you a more intense and vibrant color than liquid colorings.
- Finally, consider using a cake turntable to display your cheesecake, as this will make it easier to serve and add a professional touch to your presentation.
Storage Tips
- To store your cheesecake, let it cool completely, then wrap it tightly in plastic wrap or aluminum foil. You can store it in the refrigerator for up to 5 days or freeze it for up to 2 months.
- When reheating your cheesecake, let it come to room temperature first, then heat it in the microwave or oven until it’s warm and creamy.
- For the best results, use airtight containers to store your cheesecake, as this will help to keep it fresh and prevent it from absorbing odors or flavors from other foods.
Gift Packaging Ideas
If you’re giving this dessert as a gift, consider packaging it in a beautiful cake box or tin. You can decorate the box with ribbons or gift tags, and include a personalized note or card to make it extra special. Another idea is to package the cheesecake in a glass or plastic container, such as a mason jar or a takeout container, and top it with a layer of fresh strawberries and whipped cream.
Flavor Variations
- Different spices: Consider adding a pinch of cinnamon or nutmeg to your cheesecake batter for a warm and spicy flavor.
- Creative toppings: Instead of using strawberries, try topping your cheesecake with other fruits, such as blueberries or raspberries, or with nuts, such as pecans or walnuts.
- Ingredient swaps: For a gluten-free version of this dessert, try substituting the flour with a gluten-free alternative, such as almond flour or coconut flour. You can also use different types of sugar, such as honey or maple syrup, for a unique flavor.
Troubleshooting
- Texture problems: If your cheesecake is too dense or dry, try adding more eggs or sour cream to the batter. If it’s too wet or soggy, try adding more flour or cooking it for a few minutes longer.
- Ingredient replacements: If you don’t have cream cheese, try substituting it with a similar soft cheese, such as mascarpone or ricotta. If you don’t have strawberries, try using other fruits, such as blueberries or raspberries.
- Over/undercooking signs: If your cheesecake is overcooked, it will be dry and cracked. If it’s undercooked, it will be wet and soggy. Check for doneness by gently jiggling the pan – if the cheesecake is set, it should be firm and only slightly jiggly in the center.
FAQs
- Can I freeze it? Yes, you can freeze this dessert for up to 2 months. Simply let it cool completely, then wrap it tightly in plastic wrap or aluminum foil and place it in the freezer.
- Is it gluten-free? No, this dessert is not gluten-free, as it contains wheat flour. However, you can make a gluten-free version by substituting the flour with a gluten-free alternative, such as almond flour or coconut flour.
- Can I double the recipe? Yes, you can double this recipe to make a larger cheesecake. Simply multiply all of the ingredients by two and cook the cheesecake in a larger pan.
Conclusion
In conclusion, the red velvet cheesecake with strawberries on the top and bottom is a show-stopping dessert that’s sure to impress your family and friends. With its rich flavors, stunning appearance, and ease of preparation, it’s the perfect treat for any occasion. Whether you’re a seasoned baker or a beginner in the kitchen, this recipe is sure to become a favorite. So why not give it a try today and see what all the fuss is about? With a little practice and patience, you’ll be making beautiful and delicious cheesecakes like a pro in no time.