What’s the perfect treat to satisfy your sweet tooth? This decadent dessert features rich chocolate covered toffee, made with simple homemade ingredients like melted chocolate and crunchy English toffee, perfect for a quick weeknight indulgence, save this idea for a family favorite dessert to try soon
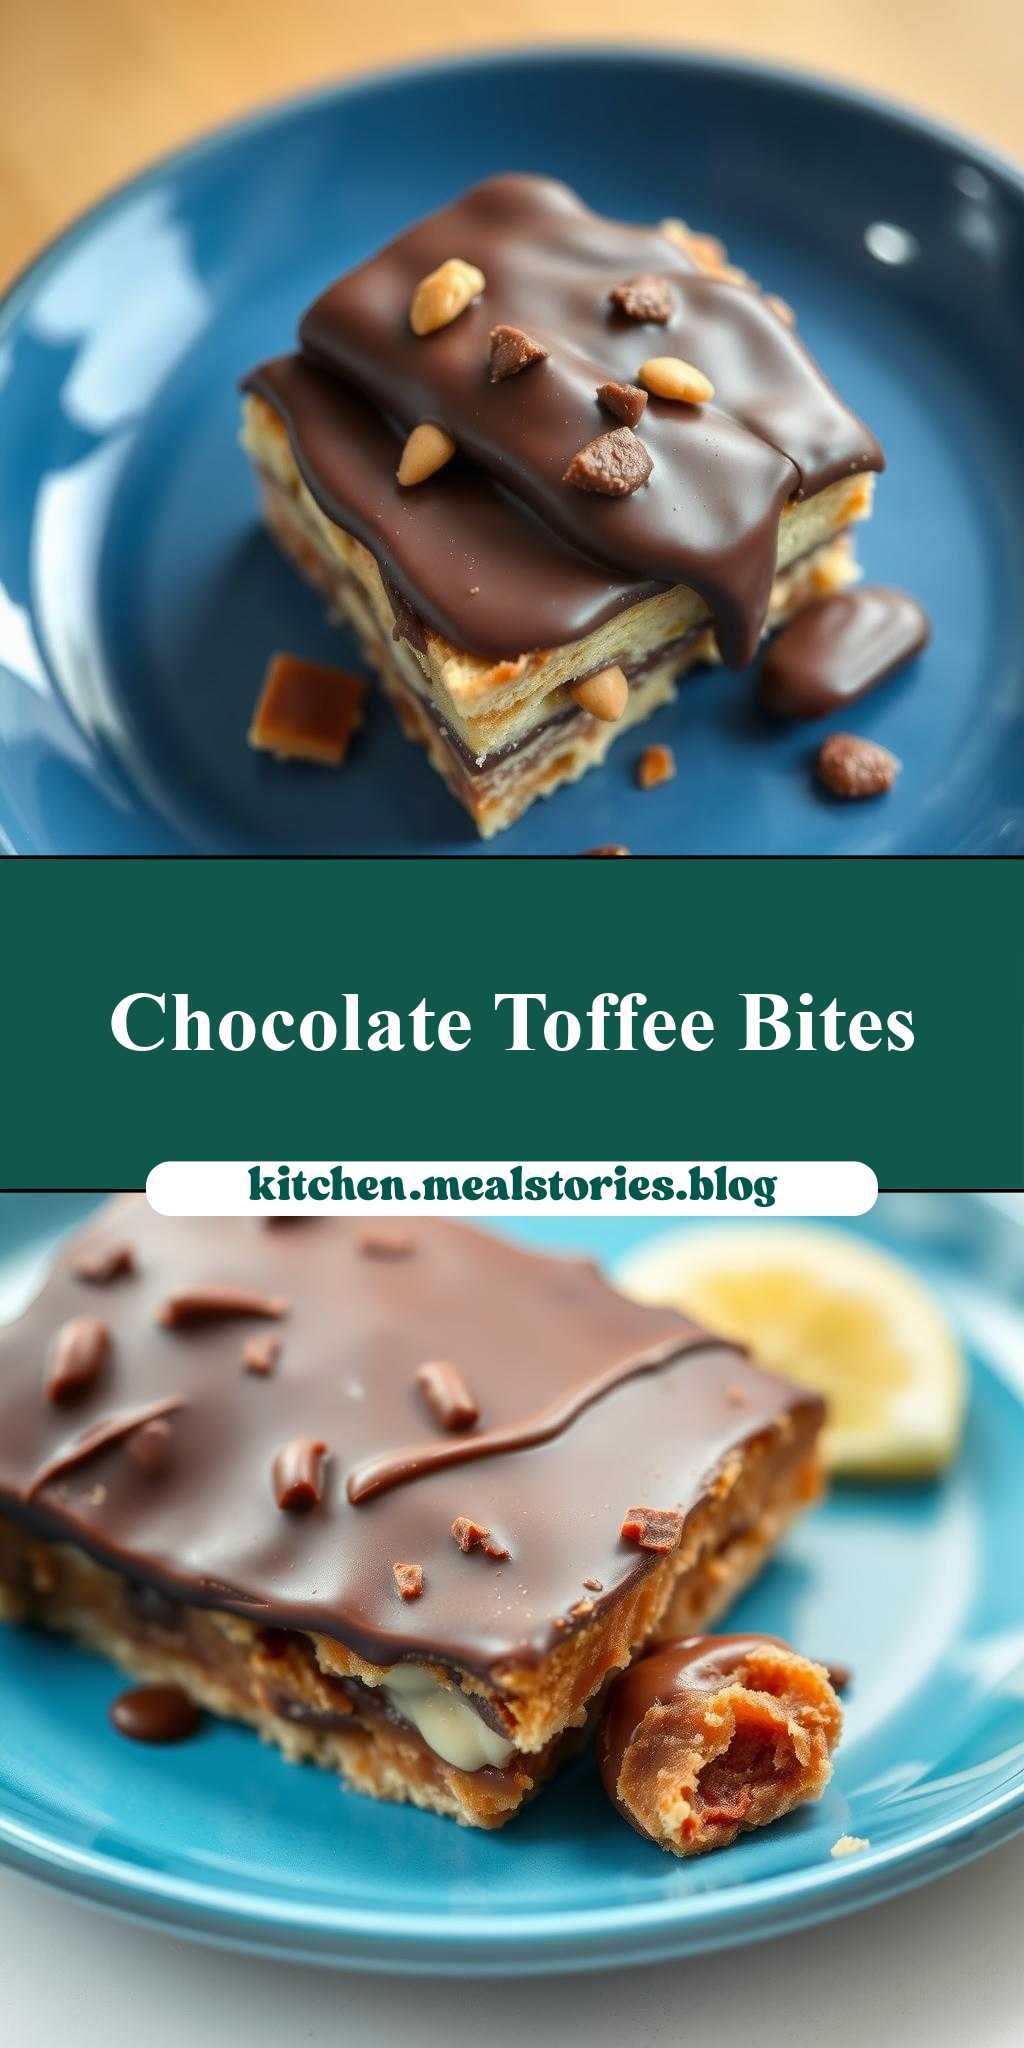
a blue plate topped with chocolate covered toffee
Introduction
Imagine a dish that combines the simplicity of everyday ingredients with the elegance of a professionally presented dessert. A blue plate topped with chocolate covered toffee is not just a dessert, it’s an experience. The combination of crunchy toffee, smooth chocolate, and the vibrant color of the blue plate creates a treat that is both visually appealing and deliciously satisfying. The best part? It’s incredibly easy to make, requiring minimal effort and ingredients that are readily available in most kitchens. Whether you’re a seasoned chef or a beginner in the kitchen, this recipe is sure to impress your family and friends with its perfect balance of flavors and textures.
Why This Works
- Flavor balance and ingredient accessibility: The richness of the chocolate pairs perfectly with the buttery, caramel flavor of the toffee, creating a delightful flavor balance that is hard to resist. Moreover, the ingredients required are easily accessible, making this dessert a practical choice for any occasion.
- Ease of preparation: Despite its impressive presentation, this dessert is surprisingly easy to prepare. The steps are straightforward, and the time required from start to finish is minimal, making it perfect for last-minute gatherings or spontaneous treats.
- Impressive results with minimal effort: The combination of the blue plate, chocolate, and toffee creates a visually stunning dessert that looks like it was prepared by a professional. This makes it an ideal choice for special occasions or events where you want to make a lasting impression without spending hours in the kitchen.
Key Ingredients
To create this stunning dessert, you will need a few key ingredients. Firstly, a blue plate sets the stage for your masterpiece. For the chocolate covered toffee, you will need toffee bits or English toffee, which can be store-bought or homemade, and chocolate chips or chocolate bars, depending on your preference for milk, dark, or white chocolate. Additional ingredients like chopped nuts (walnuts or almonds work well) can be used for garnish, adding an extra layer of texture and flavor. If you’re looking for substitutions, you can use different types of candy or nuts to create unique flavor combinations. For example, using peanut butter cups instead of chocolate can add a creamy, nutty flavor, while using pecans instead of walnuts can add a richer, more buttery flavor.
Instructions
- Step 1: Begin by preparing your ingredients. If using store-bought toffee, skip to the next step. If making homemade toffee, melt 1 cup of butter and 1 cup of brown sugar in a saucepan over medium heat, stirring constantly, until it reaches 290°F on a candy thermometer. Pour onto a greased surface and let cool. Break into bits once hardened.
- Step 2: Melt your chocolate. Place chocolate chips or broken chocolate bars in a double boiler or in a microwave-safe bowl in 30-second increments, stirring between each interval until smooth. Be careful not to overheat the chocolate.
- Step 3: Layer flavors or textures. Dip each toffee bit into the melted chocolate, using a fork or dipping tool to fully coat. Tap off any excess chocolate by gently tapping the fork or tool against the side of the bowl. Place the chocolate-covered toffee on a piece of parchment paper or a silicone mat. If using nuts for garnish, sprinkle them over the wet chocolate before it hardens.
- Step 4: Final touches and plating. Once the chocolate has hardened, arrange the chocolate-covered toffee pieces on the blue plate in a pattern that appeals to you. You can create a random pattern, a symmetrical design, or even spell out a message with the toffee pieces. The key is to have fun and be creative with your presentation.
Handy Tips
- Helpful kitchen advice: To prevent the chocolate from seizing up or becoming too thick, work in a cool environment and avoid getting any water into the chocolate. If the chocolate does become too thick, you can thin it out with a small amount of shortening like coconut oil or vegetable shortening.
- Substitutions: Consider using different types of chocolate or adding a sprinkle of sea salt to balance the sweetness. You can also experiment with different types of nuts or candy pieces to create unique flavor combinations.
- What to avoid: Avoid overheating the chocolate, as this can cause it to seize up or become too thick. Also, be careful not to overcook the toffee, as this can cause it to become too hard or brittle.
Heat Control
If you’re making your toffee from scratch, heat control is crucial. The ideal temperature for making toffee is between 285°F and 290°F. If you don’t have a candy thermometer, you can test the toffee by dropping a small amount of the mixture into cold water. If it forms a soft ball that flattens when removed from the water, it’s ready. If it doesn’t form a ball, continue cooking the toffee and testing until it reaches the correct consistency.
Crunch Factor
The crunch factor in this dessert comes from the toffee and any nuts you might choose to add. To achieve the perfect crunch, ensure that your toffee is cooked to the correct temperature and that it cools and hardens completely before coating it in chocolate. For the nuts, simply sprinkle them over the wet chocolate before it hardens, and they will adhere perfectly, adding a delightful crunch to each bite.
Pro Kitchen Tricks
- Expert tips for better results: To make your chocolate-covered toffee look more professional, use high-quality chocolate and make sure to temper it. Tempering gives the chocolate a smooth, glossy appearance and a crisp snap when broken. You can temper chocolate by heating and cooling it to specific temperatures, or by using a shortcut method like seeding the chocolate with already-tempered chocolate.
- Shortcuts: If you’re short on time, consider using store-bought toffee or chocolate that’s already tempered. This can save you a significant amount of time and effort, and still produce a delicious and impressive dessert.
- Cleanup hacks: To make cleanup easier, line your work surface with parchment paper or a silicone mat before starting. This will prevent any spills or messes from sticking to the surface, and make it easy to dispose of any waste.
Storage Tips
- Leftover storage: Store any leftover chocolate-covered toffee in an airtight container in a cool, dry place. This will help to preserve the freshness and texture of the toffee, and prevent it from becoming stale or soggy.
- Reheating tips: If you need to reheat the chocolate-covered toffee, do so gently in short increments in the microwave or in a double boiler. Be careful not to overheat the chocolate, as this can cause it to seize up or become too thick.
- Shelf life: The shelf life of chocolate-covered toffee will depend on the freshness of the ingredients and how well it’s stored. Generally, it can be stored for up to 2 weeks in an airtight container. If you notice any signs of staleness or spoilage, discard the toffee immediately.
- Best containers: The best containers for storing chocolate-covered toffee are airtight containers like glass jars or plastic containers with tight-fitting lids. These will help to preserve the freshness and texture of the toffee, and prevent it from becoming stale or soggy.
Gift Packaging Ideas
If you’re looking to give this dessert as a gift, consider packaging it in a decorative tin or box lined with parchment paper or a decorative paper. You can also wrap the chocolate-covered toffee pieces individually in cellophane bags or wrap them in decorative foil. Add a ribbon or a gift tag with a personal message to make it an extra-special gift. For a more elegant presentation, consider arranging the chocolate-covered toffee pieces on a decorative plate or platter, and wrapping the entire thing in plastic wrap or aluminum foil.
Flavor Variations
- Different spices: Consider adding a pinch of sea salt or a sprinkle of cinnamon to the chocolate before it hardens for a unique flavor twist. You can also experiment with different types of spices like nutmeg or cardamom to create a unique and exotic flavor combination.
- Creative toppings: In addition to nuts, you can use other toppings like sprinkles, shredded coconut, or even candy pieces to add color and texture to your dessert. Consider using seasonal toppings like holly sprinkles for Christmas or pastel-colored sprinkles for Easter.
- Ingredient swaps: Swap out the toffee for another type of candy or nut for a different flavor profile. You can also use different types of chocolate or add a layer of caramel or peanut butter for added flavor and texture.
Troubleshooting
- Texture problems: If your toffee becomes too hard or brittle, it may be overcooked. Try cooking it for a shorter amount of time or at a lower temperature. If your chocolate becomes too thick, you can thin it out with a small amount of shortening like coconut oil or vegetable shortening.
- Ingredient replacements: If you don’t have a specific ingredient, consider substituting it with something similar. For example, you can use milk chocolate instead of dark chocolate, or almonds instead of walnuts.
- Over/undercooking signs: If your toffee is undercooked, it will be soft and chewy. If it’s overcooked, it will be hard and brittle. If your chocolate is overcooked, it will be thick and grainy. If it’s undercooked, it will be thin and runny.
FAQs
- Can I freeze it? Yes, you can freeze chocolate-covered toffee for up to 2 months in an airtight container. Simply thaw at room temperature when you’re ready to serve.
- Is it gluten-free? Yes, this dessert is naturally gluten-free, making it a great option for those with gluten intolerance or sensitivity.
- Can I double the recipe? Yes, you can easily double or triple this recipe to make more chocolate-covered toffee. Just be sure to adjust the cooking time and temperature accordingly.
Conclusion
In conclusion, a blue plate topped with chocolate covered toffee is a simple yet impressive dessert that is perfect for any occasion. With its rich, buttery flavor and crunchy texture, it’s sure to be a hit with your family and friends. Whether you’re a seasoned chef or a beginner in the kitchen, this recipe is easy to follow and requires minimal ingredients and effort. So why not give it a try? Experiment with different flavors and toppings, and don’t be afraid to get creative with your presentation. With a little practice and patience, you’ll be making professional-looking desserts like a pro. Happy cooking!