What’s the secret to making cannoli at home without all the fuss? These mini cannoli cups are a quick and easy dessert solution, filled with sweetened ricotta cheese and chocolate chips. Perfect for a weeknight dinner treat or family favorite dessert. Save this idea for a homemade dessert to impress your loved ones, try it soon!
Mini Cannoli Cups Recipe
Introduction
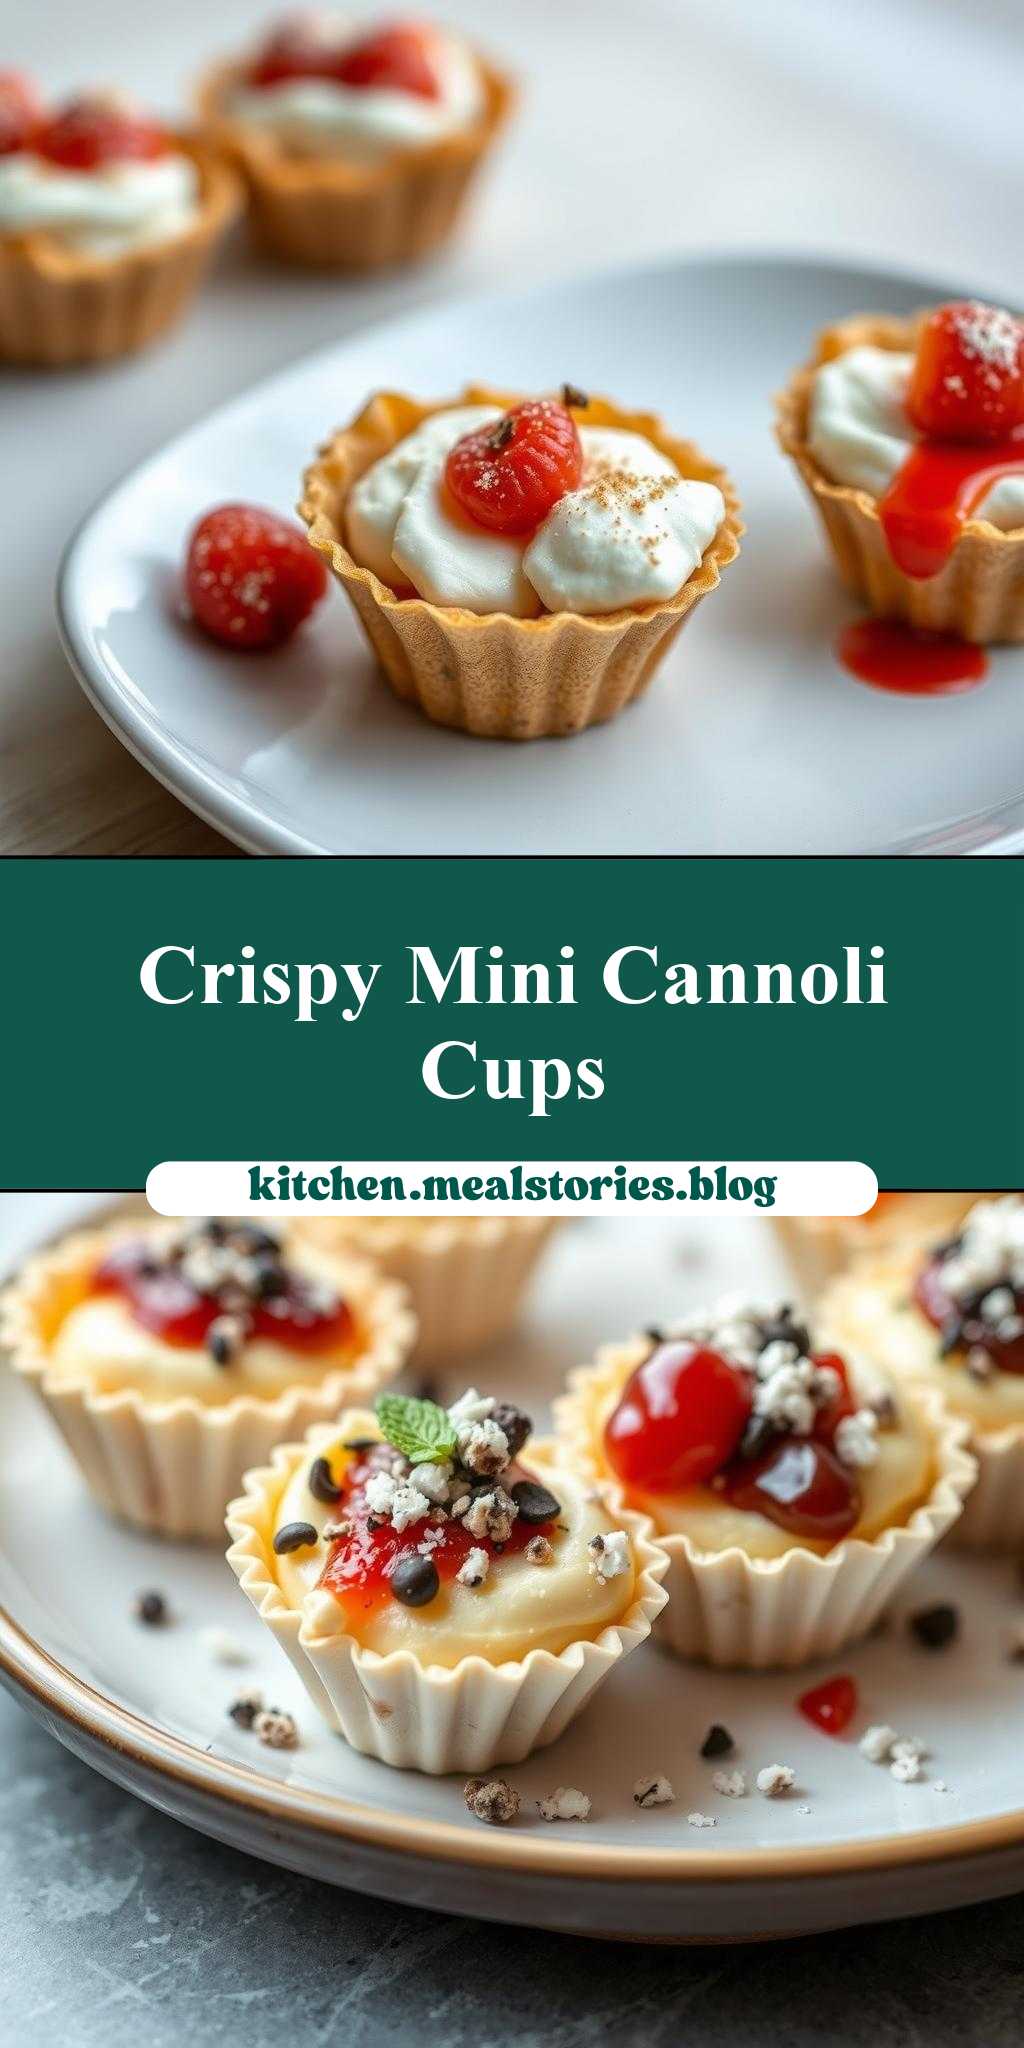
Indulge in the delightful world of Italian pastries with these Mini Cannoli Cups, a creative twist on the classic Sicilian dessert. This recipe is all about ease, flavor, and creativity, using everyday ingredients to craft a dessert that’s as impressive as it is delicious. With their crispy shells, creamy fillings, and decorative toppings, these mini cannoli cups are perfect for any occasion, from casual gatherings to special celebrations. The best part? They’re incredibly easy to make, requiring minimal effort for maximum impact. So, let’s dive into the world of mini cannoli cups and discover how to make these sweet treats shine.
Why This Works
- Flavor balance and ingredient accessibility: The combination of crispy pastry shells, sweetened ricotta cheese, and chocolate chips creates a perfectly balanced flavor profile that’s both familiar and exciting. Plus, the ingredients are easily found in most supermarkets, making this recipe accessible to everyone.
- Ease of preparation: Despite their elegant appearance, mini cannoli cups are surprisingly easy to prepare. The filling can be made ahead of time, and the pastry shells can be baked in just a few minutes, making this recipe perfect for busy home cooks.
- Impressive results with minimal effort: The presentation of these mini cannoli cups is sure to impress your friends and family. With their golden-brown pastry shells and decorative toppings, they look like they came straight from a professional bakery. But the best part is that they require minimal effort to achieve this level of elegance, making them perfect for special occasions or everyday treats.
Key Ingredients
The key ingredients in this recipe include pastry dough, ricotta cheese, confectioners’ sugar, vanilla extract, and chocolate chips. For the pastry dough, you can use either homemade or store-bought dough, whichever is more convenient for you. The ricotta cheese provides a creamy and smooth filling, while the confectioners’ sugar adds a touch of sweetness. The vanilla extract enhances the flavor of the ricotta cheese, and the chocolate chips add a nice textural element to the filling. If you want to get creative, you can also add other ingredients like candied fruit, nuts, or citrus zest to the filling for added flavor and texture.
Instructions
- Step 1: Begin by preheating your oven to 400°F (200°C). Roll out the pastry dough to a thickness of about 1/8 inch (3 mm) and use a cookie cutter or the rim of a glass to cut out circles of dough. You should be able to get about 12-15 circles.
- Step 2: Place the dough circles into a mini muffin tin, pressing them into the corners and up the sides of the tin. Bake the pastry shells for 12-15 minutes, or until they’re golden brown and crispy.
- Step 3: While the pastry shells are baking, prepare the filling by mixing together the ricotta cheese, confectioners’ sugar, and vanilla extract in a bowl until smooth. Stir in the chocolate chips and any other desired ingredients.
- Step 4: Once the pastry shells are ready, allow them to cool completely in the tin. Then, fill each shell with a spoonful of the ricotta filling and top with your desired toppings, such as candied fruit, nuts, or chocolate shavings.
Handy Tips
- To ensure that your pastry shells are crispy, make sure to bake them until they’re golden brown and firm to the touch. If they’re not crispy enough, you can try baking them for a few more minutes.
- If you find that your ricotta filling is too runny, you can try adding a little more confectioners’ sugar to thicken it. Conversely, if the filling is too thick, you can try adding a little more ricotta cheese or vanilla extract.
- To make your mini cannoli cups more stable, you can try filling them just before serving. This will help prevent the filling from making the pastry shells soggy.
Heat Control
When baking the pastry shells, it’s essential to keep an eye on the temperature and timing to ensure that they’re cooked to perfection. The ideal temperature for baking the pastry shells is 400°F (200°C), and they should be baked for 12-15 minutes, or until they’re golden brown and crispy. If you’re unsure whether the pastry shells are done, you can try checking on them after 10 minutes and then every minute or two thereafter until they’re ready.
Crunch Factor
The crunch factor is essential in mini cannoli cups, as it provides a nice textural contrast to the creamy filling. To achieve the perfect crunch, make sure to bake the pastry shells until they’re golden brown and firm to the touch. You can also try adding some crunchy ingredients to the filling, such as chopped nuts or candy pieces, to enhance the texture.
Pro Kitchen Tricks
- To make your mini cannoli cups more efficient to prepare, you can try making the filling ahead of time and storing it in the refrigerator until you’re ready to assemble the cups.
- If you’re having trouble getting the pastry shells to release from the muffin tin, you can try running a knife around the edges of each shell to loosen it.
- To add an extra touch of elegance to your mini cannoli cups, you can try dusting them with confectioners’ sugar or topping them with a sprinkle of cinnamon or cocoa powder.
Storage Tips
- To store your mini cannoli cups, you can try placing them in an airtight container in the refrigerator for up to 24 hours. Allow them to come to room temperature before serving.
- If you want to freeze your mini cannoli cups, you can try placing them in a single layer in a freezer-safe bag or container. Frozen cups can be stored for up to 2 months and thawed at room temperature when you’re ready to serve.
- To reheat your mini cannoli cups, you can try placing them in the microwave for a few seconds or until they’re warmed through. Alternatively, you can try placing them in a low-temperature oven (around 200°F or 90°C) for a few minutes until they’re warmed through.
Gift Packaging Ideas
If you want to give your mini cannoli cups as a gift, you can try packaging them in a decorative tin or box. Line the tin or box with parchment paper or a decorative paper doily, and arrange the cups in a single layer. You can also try adding some decorative touches, such as a sprinkle of confectioners’ sugar or a few chocolate shavings, to make the gift more elegant. Finally, consider adding a gift tag or card with a personal message to make the gift even more special.
Flavor Variations
- Different spices: Try adding a pinch of cinnamon, nutmeg, or cardamom to the filling for a unique flavor twist.
- Creative toppings: Consider topping your mini cannoli cups with chopped nuts, candy pieces, or shredded coconut for added texture and flavor.
- Ingredient swaps: If you want to make your mini cannoli cups more decadent, you can try swapping the ricotta cheese with mascarpone or adding some melted chocolate to the filling.
Troubleshooting
- Texture problems: If your pastry shells are too soggy or too crispy, you can try adjusting the baking time or temperature. If your filling is too runny or too thick, you can try adjusting the amount of confectioners’ sugar or ricotta cheese.
- Ingredient replacements: If you’re missing an ingredient or want to make a substitution, you can try using a similar ingredient as a replacement. For example, you can use mascarpone cheese instead of ricotta or add some melted chocolate to the filling.
- Over/undercooking signs: If your pastry shells are overcooked, they may be too brown or crispy. If they’re undercooked, they may be too pale or soft. Adjust the baking time or temperature accordingly to achieve the perfect texture.
FAQs
- Can I freeze it? Yes, you can freeze your mini cannoli cups for up to 2 months. Simply place them in a single layer in a freezer-safe bag or container and thaw at room temperature when you’re ready to serve.
- Is it gluten-free? The pastry dough used in this recipe contains gluten, so it’s not suitable for those with gluten intolerance or sensitivity. However, you can try using a gluten-free pastry dough as a substitute.
- Can I double the recipe? Yes, you can easily double or triple this recipe to make more mini cannoli cups. Simply multiply the ingredients accordingly and adjust the baking time as needed.
Conclusion
In conclusion, these mini cannoli cups are a delicious and elegant dessert that’s perfect for any occasion. With their crispy pastry shells, creamy fillings, and decorative toppings, they’re sure to impress your friends and family. Whether you’re a beginner or an experienced baker, this recipe is easy to follow and requires minimal effort for maximum impact. So why not give it a try and see how delicious and fun these mini cannoli cups can be? Don’t be afraid to experiment with different flavors and toppings to make the recipe your own, and don’t hesitate to reach out if you have any questions or need further guidance.