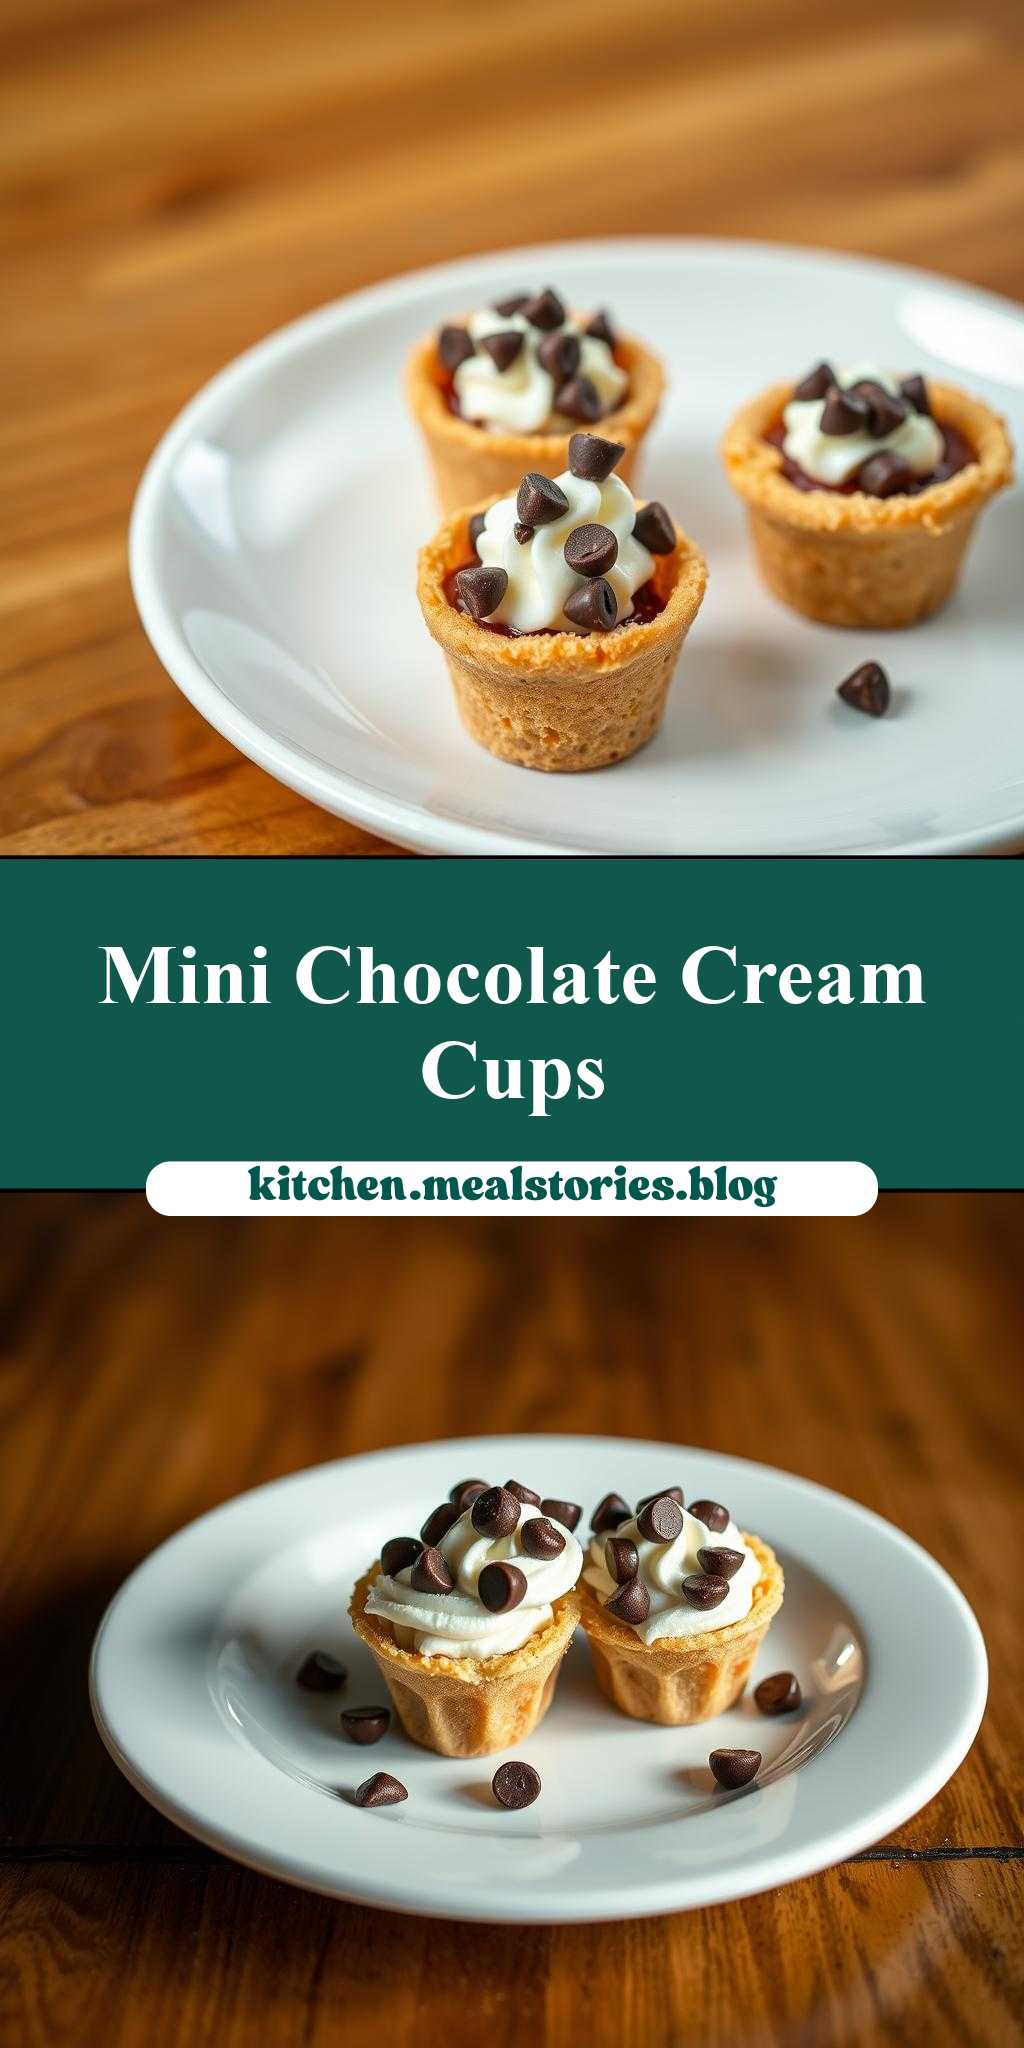
What’s the secret to a show-stopping Italian dessert that’s incredibly easy to make at home? Mini cannoli cups filled with sweetened cream and dark chocolate chips are a quick and delicious solution for any weeknight dinner party, requiring just a few simple ingredients like crunchy pastry shells and rich chocolate. Save this idea for your next family gathering or special occasion.
mini cannoli cups with chocolate chips and cream on top, sitting on a wooden table
Introduction
Indulge in the delightful world of Italian desserts with these charming mini cannoli cups, perfectly topped with chocolate chips and a dollop of cream. This recipe is a masterclass in ease, flavor, and creativity, utilizing everyday ingredients to create a treat that’s as impressive as it is delicious. Whether you’re a seasoned baker or a novice in the kitchen, these bite-sized cannoli cups are sure to captivate your taste buds and leave you wanting more. With their crispy shells, creamy fillings, and the sweetness of chocolate, they’re the perfect dessert for any occasion, from casual gatherings to special celebrations.
Why This Works
- Flavor balance and ingredient accessibility: The combination of cannoli cream, chocolate chips, and the crunch of the cannoli shell creates a perfect balance of flavors and textures that is hard to resist. Moreover, the ingredients are easily accessible in most supermarkets, making this dessert highly achievable.
- Ease of preparation: Despite their elegant appearance, these mini cannoli cups are surprisingly easy to prepare. The filling can be made ahead of time, and the assembly is straightforward, making it a stress-free dessert option.
- Impressive results with minimal effort: The presentation of these mini cannoli cups, with their golden shells and generously topped with chocolate chips and cream, is impressive and sure to wow your guests. The best part? It requires minimal effort to achieve such a stunning and delicious dessert.
Key Ingredients
The main ingredients for these delightful mini cannoli cups include cannoli shells, which can be found in the bakery or international section of most grocery stores, or made at home for an extra-special touch. The filling consists of sweetened ricotta cheese, which provides a creamy base, vanilla extract for added depth of flavor, and powdered sugar to balance the sweetness. Chocolate chips are used for topping, adding a burst of chocolate flavor to each bite. Whipped cream is the final touch, providing a light and airy contrast to the rich cannoli cream and chocolate. For practical substitutions, mascarpone cheese can be used in place of ricotta for an even creamier filling, and different types of chocolate chips can be experimented with for varying flavor profiles.
Instructions
- Step 1: Begin by preparing your filling. In a medium bowl, combine the ricotta cheese, vanilla extract, and powdered sugar. Mix until smooth and creamy, ensuring the sugar is well incorporated. Set aside in the refrigerator to chill.
- Step 2: If using store-bought cannoli shells, follow the package instructions for any necessary preparation, such as baking. If making your own shells, mix together flour, lard or butter, vinegar, and water to form a dough. Rest the dough, then roll it out and use a cookie cutter or the rim of a glass to cut out circles. Fry these circles in hot oil until they are golden and crispy, then let them cool on paper towels.
- Step 3: To assemble the cannoli cups, fill a piping bag with the chilled ricotta mixture and pipe into the cooled cannoli shells. Top each filled shell with a dollop of whipped cream and sprinkle with chocolate chips.
- Step 4: For the final touches, consider dusting the tops with additional powdered sugar or cocoa powder for extra flavor and visual appeal. Arrange the mini cannoli cups on a serving platter or individual plates and serve immediately to enjoy the optimal texture and freshness.
Handy Tips
- For the best results, ensure your ricotta cheese is well-drained before mixing to avoid a too-watery filling. You can do this by wrapping it in cheesecloth and letting it sit in a strainer over a bowl in the refrigerator for a few hours.
- When frying homemade cannoli shells, do not overcrowd the pot, as this can lower the oil temperature and result in greasy or undercooked shells. Fry in batches if necessary.
- Experiment with different flavors by adding a teaspoon of cinnamon, nutmeg, or citrus zest to the ricotta mixture for unique twists on the classic cannoli flavor.
Heat Control
If you’re choosing to fry your own cannoli shells, heat control is crucial. The ideal temperature for frying is between 375°F and 400°F. Too low, and the shells will absorb too much oil; too high, and they’ll burn before they’re fully cooked. Use a thermometer to monitor the temperature, and adjust your heat as necessary. The shells are done when they’re golden brown and crispy, which should take about 2-3 minutes on each side, depending on the size and the temperature of the oil.
Crunch Factor
The crunch factor in these mini cannoli cups comes from the shells themselves. To achieve the perfect crunch, ensure that your oil is at the correct temperature when frying. Undercooked shells will be soft and chewy, while overcooked ones will be too hard. The right balance, achieved through proper frying technique and temperature control, will yield shells that are crispy on the outside and still retain a delicate interior. For store-bought shells, follow any package instructions for baking or toasting to enhance crispiness.
Pro Kitchen Tricks
- To prevent your cannoli shells from becoming soggy, fill them just before serving. If you must fill them ahead of time, consider using a higher ratio of cream cheese to ricotta in your filling, as cream cheese holds up better against the moisture of the shells.
- For an elegant presentation, garnish each cannoli cup with a sprinkle of powdered sugar or a piece of chocolate shavings. This adds a professional touch and can elevate the dessert from casual to special occasion worthy.
- Invest in a piping bag with a large round tip for filling the cannoli shells. This makes the process quicker and neater, allowing for a more uniform and visually appealing fill.
Storage Tips
- Unfilled cannoli shells can be stored in an airtight container at room temperature for up to 2 days. Filled shells are best consumed immediately but can be refrigerated for a few hours before serving.
- For longer storage, the ricotta filling can be made ahead and stored in the refrigerator for up to a day. Allow it to come to room temperature before filling the shells for the best consistency.
- Whipped cream is best whipped just before serving, as it will deflate over time. However, you can prepare the cream ahead by chilling it in the refrigerator, then whipping it when you’re ready to assemble the cannoli cups.
Gift Packaging Ideas
These mini cannoli cups make delightful gifts, especially when beautifully packaged. Consider placing a few cups in a decorative tin or box lined with parchment paper. You can also wrap each cup individually in cellophane bags and tie with a ribbon, adding a gift tag with a personal message. For a more rustic touch, use small wooden crates or baskets, filling any empty spaces with decorative paper shreds or small candies to prevent the cups from moving around.
Flavor Variations
- Different spices: Introduce warm spices like cinnamon, nutmeg, or cardamom into the ricotta mixture for a unique twist. These spices pair particularly well with the sweetness of the chocolate chips.
- Creative toppings: Instead of chocolate chips, experiment with other toppings like chopped nuts, dried fruit, or even candy pieces for a fun and colorful look.
- Ingredient swaps: For a dairy-free version, consider using vegan ricotta alternatives or making your own by blending together cashews, water, and lemon juice, then straining the mixture through cheesecloth.
Troubleshooting
- Texture problems: If your filling is too runny, refrigerate it for a few hours to firm up. If it’s too thick, you can thin it out with a small amount of heavy cream or milk.
- Ingredient replacements: If you can’t find cannoli shells, consider using waffle cones or even making your own shells from scratch. For the filling, mascarpone or a mix of cream cheese and ricotta can offer similar textures and flavors.
- Over/undercooking signs: For fried shells, undercooking will result in soft, pale shells, while overcooking yields hard, dark shells. Adjust your frying time and temperature accordingly to achieve the perfect golden crispiness.
FAQs
- Can I freeze it? Yes, you can freeze the filled cannoli cups, but it’s best to freeze them without the whipped cream topping. Simply thaw in the refrigerator overnight and top with whipped cream before serving.
- Is it gluten-free? Traditional cannoli shells contain gluten, but you can find gluten-free alternatives or make your own gluten-free dough for the shells. Be sure to check the ingredients of any store-bought shells or ricotta cheese for gluten.
- Can I double the recipe? Absolutely, this recipe can be easily doubled or even tripled for larger gatherings. Just be sure to have enough cannoli shells and ingredients for the filling and toppings.
Conclusion
With these mini cannoli cups, you’re not just making a dessert; you’re creating an experience. The combination of crunchy shells, creamy ricotta filling, and the sweetness of chocolate chips and whipped cream is a match made in heaven. Whether you’re a fan of traditional Italian desserts or just looking for a new treat to wow your friends and family, these bite-sized cannoli cups are sure to please. So go ahead, get creative with the recipe, and enjoy the process of making something truly special. Buon appetito!