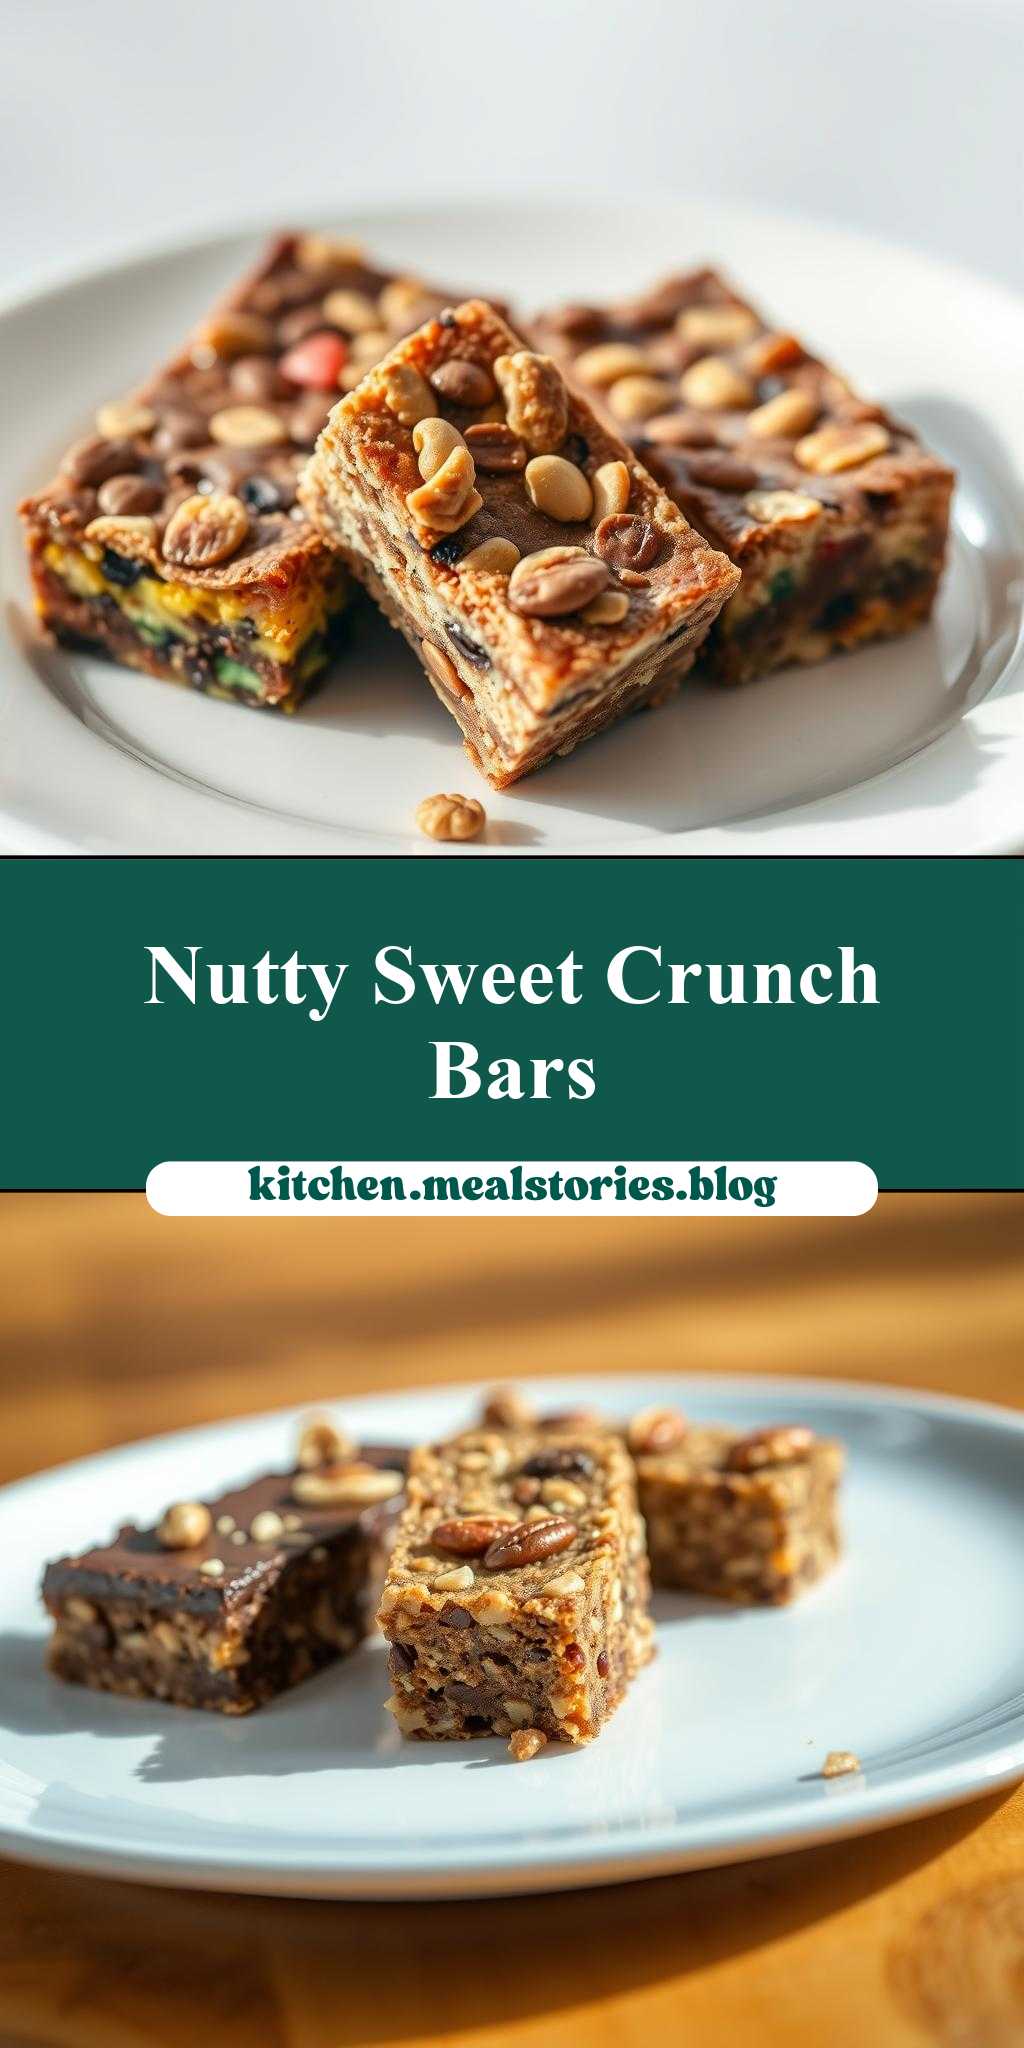
What’s the perfect trio of treats to satisfy your sweet tooth? This plate features three distinct bars, one with a delightful crunch from toasted nuts, made with easy homemade goodness and perfect for a weeknight dinner dessert. Save this idea for a quick dessert fix anytime.
there are three different types of bars on the plate and one has nuts in it
Introduction
Imagine a delightful platter filled with an assortment of sweet treats. “There are three different types of bars on the plate and one has nuts in it” is more than just a description; it’s an invitation to a world of flavors and textures. This recipe is all about creativity, ease, and the joy of using everyday ingredients to create something truly special. Whether you’re a seasoned baker or just starting out, this collection of bars is sure to impress. With a perfect balance of flavors, textures, and the added crunch of nuts in one of the bars, this recipe is a must-try for anyone looking to elevate their dessert game.
Why This Works
- Flavor balance and ingredient accessibility: Each bar type offers a unique flavor profile, from the richness of chocolate to the sweetness of caramel and the earthiness of nuts, all made with easily accessible ingredients.
- Ease of preparation: Despite the variety, these bars are surprisingly simple to make, requiring minimal special equipment and straightforward techniques.
- Impressive results with minimal effort: The combination of textures and flavors is sure to impress, whether you’re serving at a family gathering or a more formal event, all achieved with relatively little fuss.
Key Ingredients
The main ingredients for these bars include a base of all-purpose flour, granulated sugar, and unsalted butter, which provide the foundation for each bar type. For added flavor and texture, you’ll also use semi-sweet chocolate chips, caramel sauce, chopped nuts (such as walnuts or pecans), and a pinch of sea salt. Practical substitutions can be made for dietary restrictions, such as using gluten-free flour or vegan chocolate alternatives. Each bar type will highlight the unique ingredients that make it special, ensuring there’s something for everyone on the plate.
Instructions
- Step 1: Begin by preheating your oven to 350°F (175°C). Prepare your baking pans (approximately 8×8 inches each) by lining them with parchment paper for easy removal of the bars once they’re baked and cooled.
- Step 2: Mix the base ingredients (flour, sugar, and melted butter) in a large bowl until well combined. This mixture will serve as the base for all three types of bars. Divide the mixture evenly among three bowls to prepare for the addition of unique ingredients for each bar type.
- Step 3: For the first bar type (let’s say the chocolate bar), add chocolate chips to one of the bowls with the base mixture and stir until the chocolate is evenly distributed. For the second bar type (the caramel bar), mix in caramel sauce. For the third bar type (the nut bar), fold in chopped nuts and a sprinkle of sea salt. Press each mixture into a prepared baking pan.
- Step 4: Bake each bar type for about 20-25 minutes, or until they are lightly golden brown on top and set. Remove from the oven and let cool completely in the pans.
Handy Tips
- To ensure the bars cut cleanly, it’s helpful to refrigerate them for about 30 minutes before slicing. For a fun twist, consider adding different toppings to each bar type before baking, such as sprinkles for the chocolate bar or a drizzle of extra caramel on the caramel bar.
Heat Control
If you’re using the oven, as in this recipe, ideal heat control is crucial. The oven should be preheated to 350°F (175°C), and baking time may vary slightly depending on your oven’s performance. Look for the bars to be lightly golden brown and firm to the touch as signs of doneness.
Crunch Factor
Achieving the right crunch factor, especially in the nut bar, can elevate the dessert. The combination of a crunchy nut topping and a chewy base provides a delightful textural contrast. To enhance crunch, ensure the nuts are toasted lightly before adding them to the bar mixture, and consider a short broil after baking to crisp the top, if desired.
Pro Kitchen Tricks
- For easier cleanup, prepare all your ingredients before starting to mix, and use parchment paper or a silicone mat for your workspace. To make the bars more visually appealing, press a few extra nuts or chocolate chips into the top of each bar immediately after baking, while they’re still warm.
Storage Tips
- Once the bars are completely cool, they can be stored in an airtight container at room temperature for up to 5 days. For longer storage, consider freezing the bars, wrapped tightly in plastic wrap or aluminum foil, for up to 2 months. To reheat, simply thaw at room temperature or reheat in the microwave for a few seconds.
Gift Packaging Ideas
These bars make excellent gifts, especially when packaged thoughtfully. Consider arranging a selection of each bar type in a decorative tin or box, separated by parchment paper. Add a ribbon or a gift tag with a personal message for a touch of warmth. For a more rustic appeal, wrap bars individually in wax paper or cellophane bags and tie with twine.
Flavor Variations
- Different spices: Add a pinch of cinnamon or nutmeg to the base mixture for a warm, spicy flavor.
- Creative toppings: Before baking, top the bars with creative ingredients like dried cranberries, coconut flakes, or even candy pieces for added flavor and visual appeal.
- Ingredient swaps: Substitute the nuts with seeds (like sunflower or pumpkin seeds) for a nut-free version, or use different types of sugar (like brown sugar) for a richer flavor.
Troubleshooting
- Texture problems: If the bars turn out too hard, they may have been overbaked. If too soft, they might not have been baked long enough. Adjust baking time as needed for your oven.
- Ingredient replacements: Always consider the flavor and texture the ingredient brings when substituting. For example, replacing nuts with seeds will change the texture and flavor profile.
- Over/undercooking signs: Keep an eye on the bars while they’re baking, looking for the lightly golden brown color and firmness to the touch as indicators of doneness.
FAQs
- Can I freeze it? Yes, these bars can be frozen for up to 2 months. Wrap them tightly in plastic wrap or aluminum foil and thaw at room temperature when you’re ready to serve.
- Is it gluten-free? The original recipe includes all-purpose flour, which contains gluten. However, you can easily make a gluten-free version by substituting the flour with a gluten-free flour blend.
- Can I double the recipe? Absolutely! Simply double all the ingredients and bake in larger pans. Keep an eye on the baking time, as larger batches may take a bit longer to cook through.
Conclusion
Creating a platter with three different types of bars, one of which includes nuts, is a fun and rewarding baking project. It’s perfect for those who love variety and are looking to impress with minimal effort. Whether you’re baking for a crowd or just a few, this recipe offers a delightful mix of flavors and textures that are sure to please. Don’t be afraid to experiment with the recipe, trying out new ingredients and flavor combinations to make it your own. Happy baking, and enjoy the delightful world of bars!