What makes a dessert truly unforgettable? This show-stopping homemade cake is topped with Oreo cookies and finished with a rich red icing drizzle, perfect for a quick and easy family favorite treat, save this idea for your next special occasion or weeknight dinner dessert, try it soon
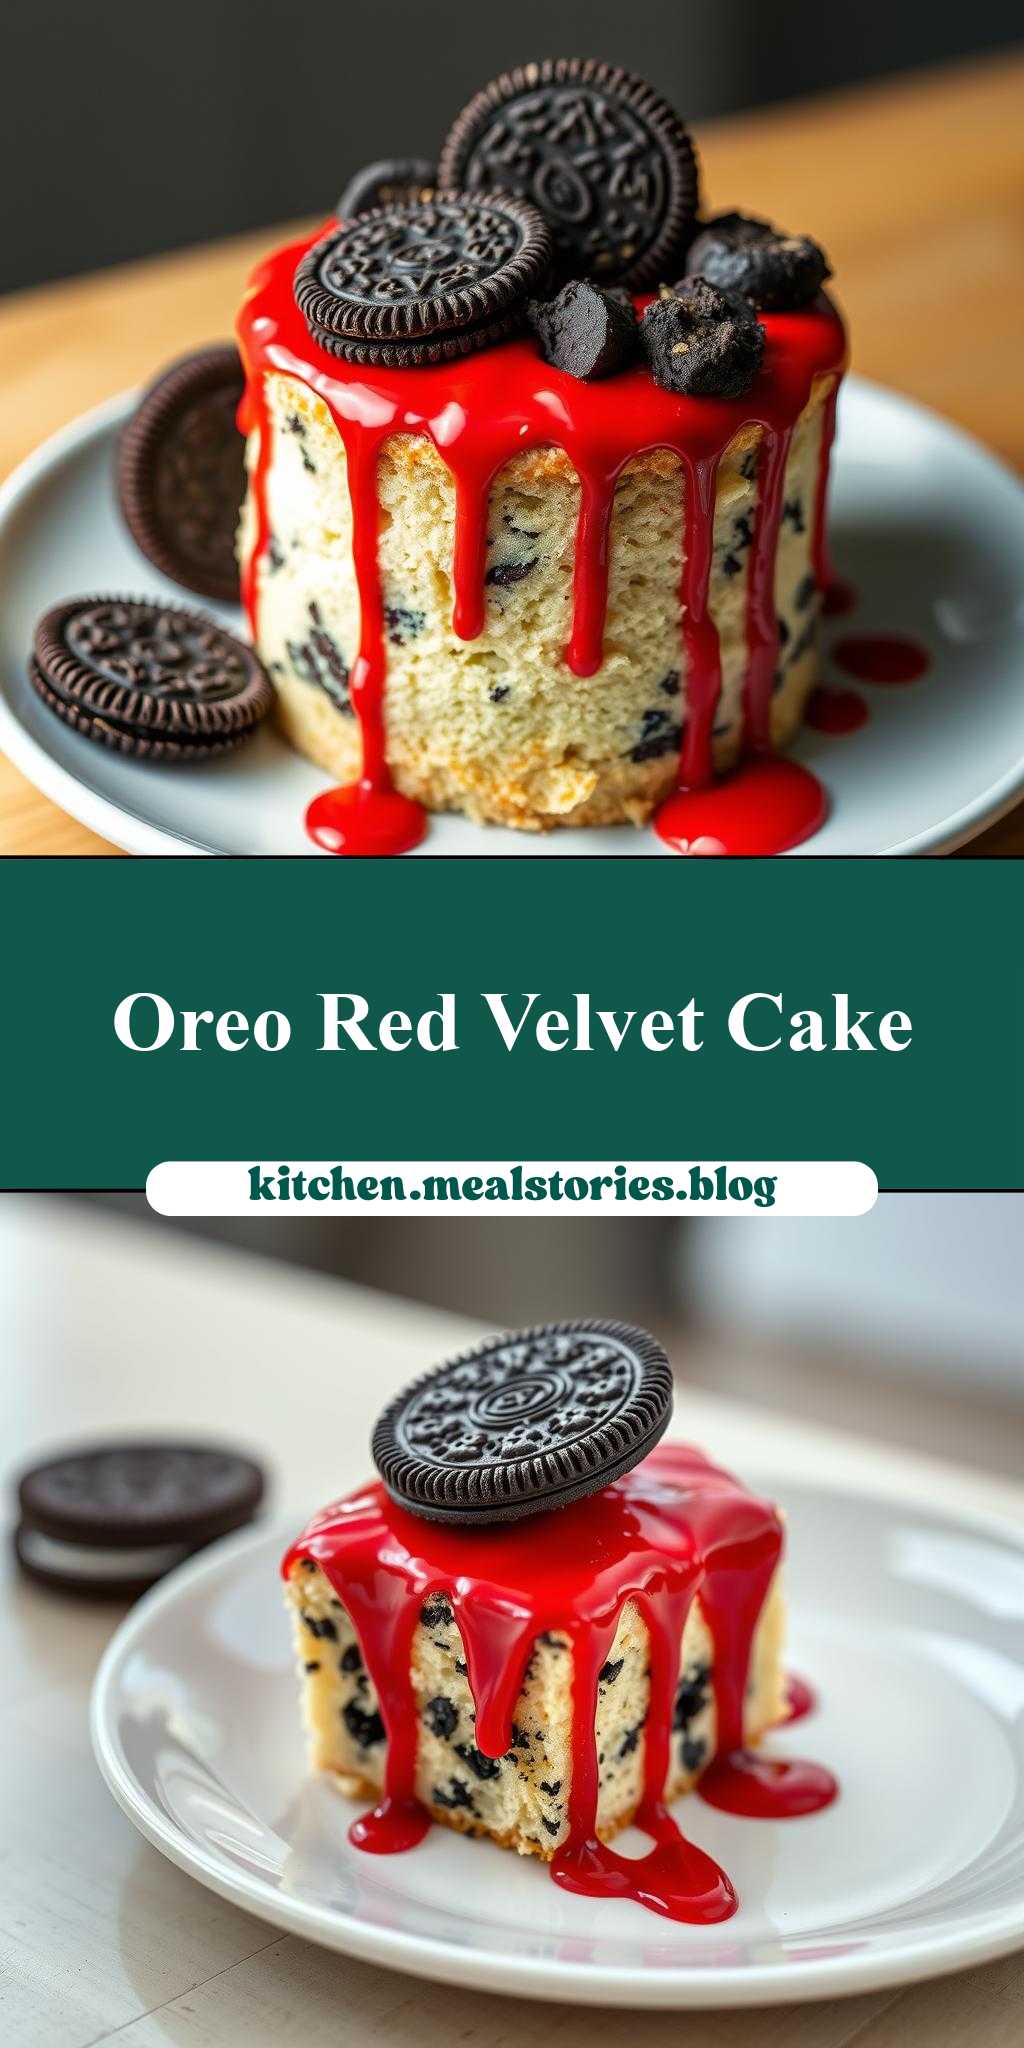
a cake with oreo cookies on top and red icing drizzled over it
Introduction
This delightful dessert is a perfect blend of textures and flavors, combining the richness of cake, the crunch of Oreo cookies, and the sweetness of red icing. What makes this recipe truly special is its accessibility and ease of preparation. Using everyday ingredients and simple steps, anyone can create this stunning dessert that’s sure to impress. Whether you’re a seasoned baker or a beginner in the kitchen, this cake with Oreo cookies on top and red icing drizzled over it is a creative and delicious way to satisfy your sweet tooth.
Why This Works
- Flavor balance and ingredient accessibility: The combination of moist cake, crunchy Oreo cookies, and sweet red icing creates a perfect balance of flavors and textures. Moreover, all the ingredients are easily available in most grocery stores, making it convenient to prepare.
- Ease of preparation: The steps involved in making this dessert are straightforward and simple. From preparing the cake batter to drizzling the red icing, each step is easy to follow and execute.
- Impressive results with minimal effort: Despite its simplicity, the end result is visually appealing and tastes incredible. The Oreo cookies on top and the red icing drizzled over the cake give it a professional touch that requires minimal effort.
Key Ingredients
The main ingredients for this dessert include all-purpose flour, sugar, eggs, butter, milk, Oreo cookies, and red icing. For the cake, you’ll need flour, sugar, eggs, and butter. The Oreo cookies are used as a topping, and the red icing is used to drizzle over the cake. Practical substitutions can be made for some ingredients, such as using almond milk instead of regular milk for a dairy-free option or using different types of sugar like brown sugar for a slightly different flavor.
Instructions
- Step 1: Begin by preheating your oven to 350°F (175°C). Prepare your cake pans by greasing them with butter and dusting them with flour. Then, chop the Oreo cookies if you prefer a finer crunch on top of your cake.
- Step 2: Mix the cake batter by combining flour, sugar, eggs, and butter in a large mixing bowl. Add milk and mix until the batter is smooth. Divide the batter evenly between the prepared pans and bake for about 20-25 minutes or until a toothpick inserted into the center comes out clean.
- Step 3: Once the cakes are baked and cooled, you can start assembling your dessert. Place one of the cakes on a serving plate, and if desired, add a layer of icing or jam to hold the Oreo cookies in place. Arrange the Oreo cookies on top of the cake. You can use them whole or crush them for a different texture.
- Step 4: Finally, drizzle the red icing over the Oreo cookies. You can make your own red icing by mixing powdered sugar with a small amount of milk and adding a few drops of red food coloring until you achieve the desired color and consistency. Alternatively, you can use store-bought red icing for convenience.
Handy Tips
- To ensure your cake is moist, don’t overmix the batter, and make sure to not overbake it. For the Oreo topping, you can experiment with different patterns or designs to make your dessert more visually appealing. If you find that your red icing is too thick, you can thin it out with a little more milk, and if it’s too thin, you can add more powdered sugar.
Heat Control
For baking the cake, it’s crucial to maintain the right temperature and baking time. The ideal temperature is 350°F (175°C), and the cakes are usually done in 20-25 minutes. Check for doneness by inserting a toothpick into the center of the cake; if it comes out clean, the cake is ready. Avoid opening the oven door too frequently, as this can cause the cakes to sink or not cook evenly.
Crunch Factor
The crunch factor in this dessert comes from the Oreo cookies on top. To achieve the perfect crunch, you can either use the Oreo cookies whole, which provides a nice texture contrast to the soft cake, or you can crush them into smaller pieces for a more evenly distributed crunch. The choice depends on your personal preference and the desired texture of your final dessert.
Pro Kitchen Tricks
- One expert tip for making this dessert stand out is to pay attention to the presentation. Arrange the Oreo cookies in a pattern or spell out a message with them for a personalized touch. Additionally, using high-quality ingredients, such as real butter and pure vanilla extract, can elevate the flavor of your cake.
Storage Tips
Gift Packaging Ideas
This dessert makes a wonderful gift, especially for birthdays or special occasions. Consider packaging the cake in a decorative box or on a nice serving plate, covered with plastic wrap or aluminum foil to keep it fresh. You can also add a personal touch by including a handwritten note or a small gift along with the cake. For a more rustic look, use a wooden board or a wicker basket, and don’t forget to drizzle the red icing in a decorative pattern just before gifting.
Flavor Variations
- Different spices: You can add a pinch of cinnamon, nutmeg, or cardamom to the cake batter for a unique flavor twist.
- Creative toppings: Instead of Oreo cookies, you can use other types of cookies, nuts, or even fresh fruits to change up the texture and flavor.
- Ingredient swaps: For a gluten-free version, substitute the all-purpose flour with a gluten-free flour mix. You can also use dairy-free milk alternatives and vegan butter substitutes to cater to different dietary needs.
Troubleshooting
- Texture problems: If your cake turns out too dense, it might be due to overmixing the batter. If it’s too dry, it could be overbaked. Adjust your mixing time and baking time accordingly in your next attempt.
- Ingredient replacements: Always try to use the exact ingredients called for in the recipe, but if you need to make substitutions, do so with similar ingredients. For example, if you don’t have butter, you can use margarine, but keep in mind it might affect the flavor slightly.
- Over/undercooking signs: Keep an eye on your cake while it’s baking, and check it frequently towards the end of the baking time. An undercooked cake will be wet and soggy, while an overcooked cake will be dry and possibly cracked.
FAQs
- Can I freeze it? Yes, you can freeze the cake without the Oreo topping and red icing for up to 2 months. Thaw and assemble when ready to serve.
- Is it gluten-free? Not in its original form, but you can make it gluten-free by substituting the all-purpose flour with a gluten-free flour mix.
- Can I double the recipe? Yes, you can easily double or even triple the recipe if you’re serving a larger crowd. Just remember to adjust the baking time slightly for larger cakes.
Conclusion
In conclusion, making a cake with Oreo cookies on top and red icing drizzled over it is a fun and rewarding baking project that’s perfect for any occasion. With its simple ingredients, easy steps, and impressive results, it’s a great recipe for beginners and experienced bakers alike. Don’t hesitate to experiment with different flavors and toppings to make the recipe your own, and enjoy sharing this delightful dessert with friends and family. Happy baking!