What’s the secret to making indulgent treats at home with minimal fuss? These red velvet cake balls are a game changer, made with simple homemade cake and cream cheese frosting. Perfect for a quick dessert fix, try making them with melted chocolate for an extra rich taste. Save this idea for your next family gathering or special occasion.
red velvet cake balls on a white plate
Introduction
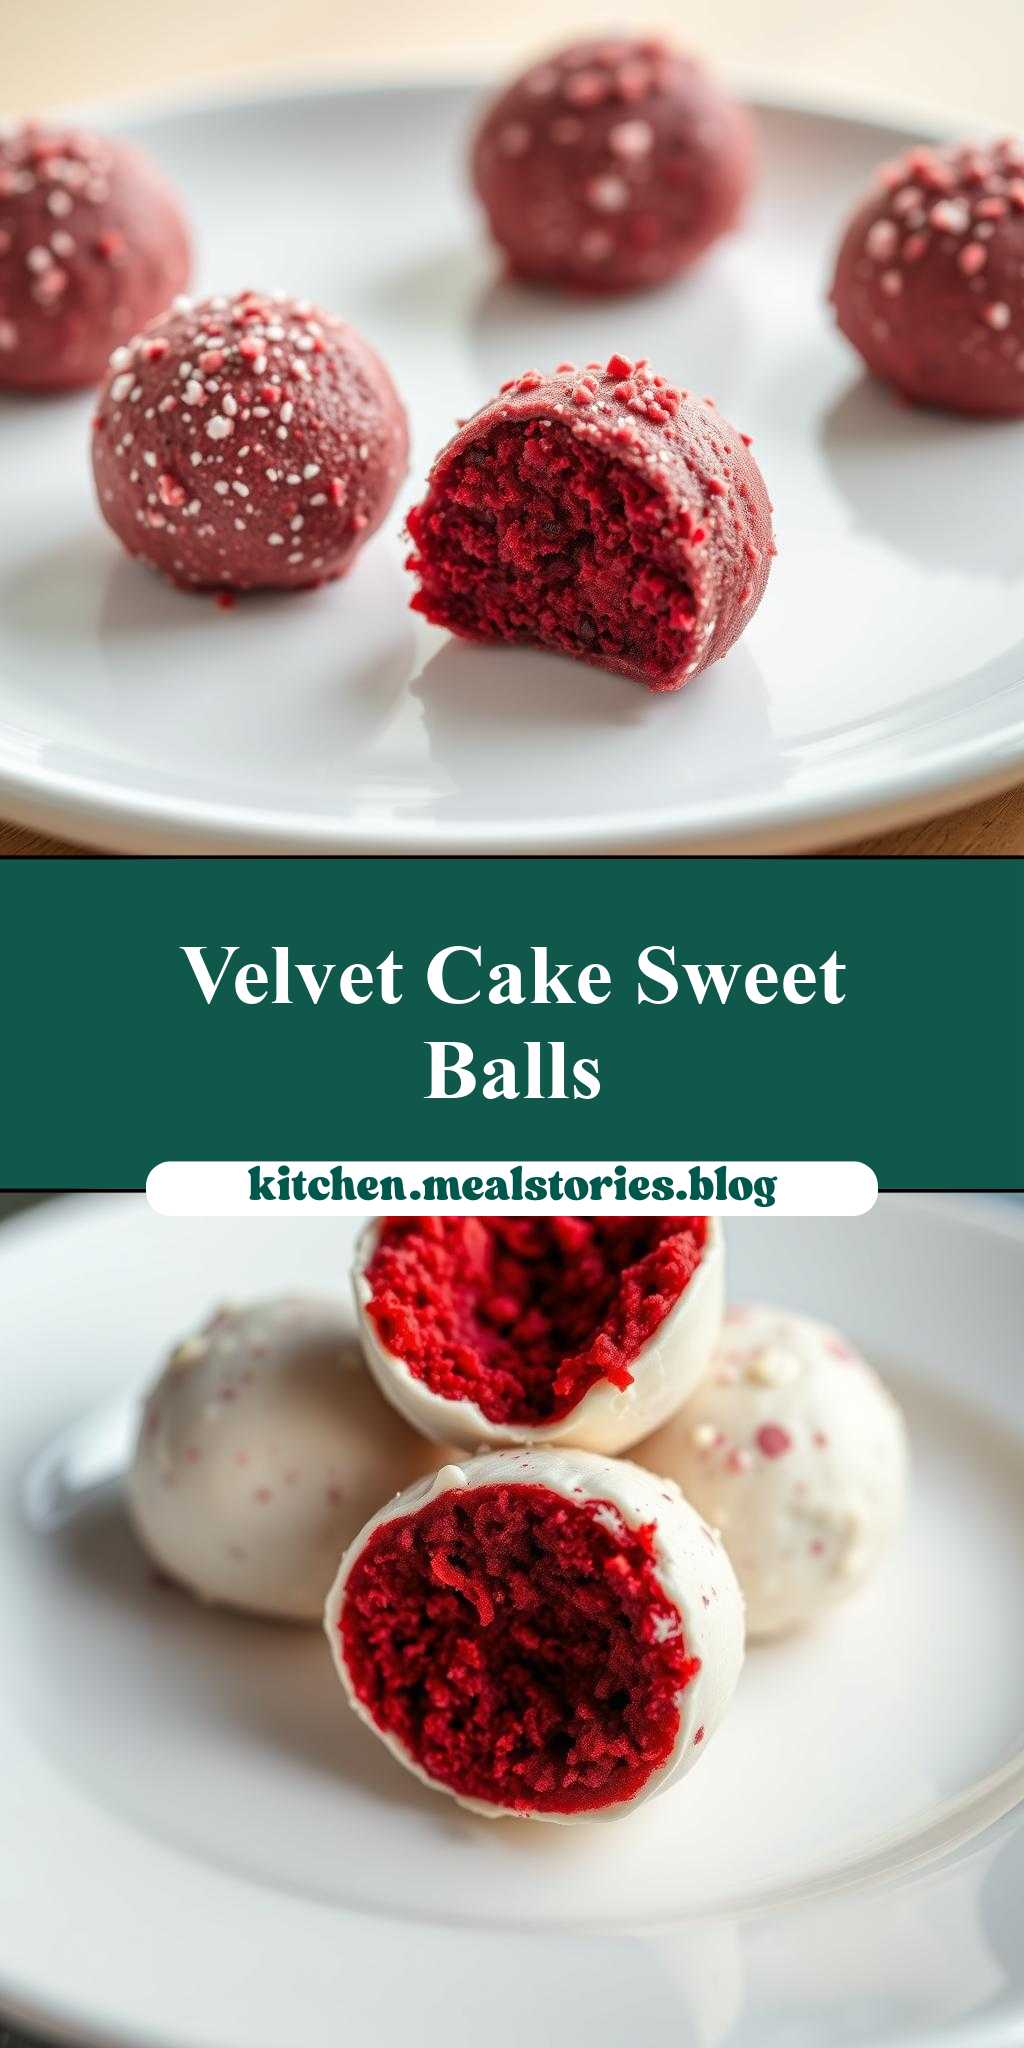
Indulge in the rich, velvety goodness of red velvet cake, reimagined into bite-sized balls of decadence, perfectly displayed on a crisp white plate. This creative dessert is not only a feast for the eyes but also a masterclass in balancing flavors and textures using everyday ingredients. With its deep red hue and subtle cocoa flavor, combined with the creaminess of cheese frosting, these cake balls are sure to impress both in taste and presentation. What makes this dessert truly special is its accessibility; with simple ingredients and straightforward instructions, anyone can create these stunning treats, making them perfect for special occasions or as a unique gift.
Why This Works
- Flavor balance and ingredient accessibility: The combination of red velvet cake and cream cheese frosting creates a delightful harmony of flavors that is both familiar and exciting. The use of common ingredients makes this dessert easy to prepare without needing to hunt down specialty items.
- Ease of preparation: Despite their elegant appearance, red velvet cake balls are surprisingly easy to make. The process involves baking a cake, crumbling it, mixing it with frosting, shaping into balls, and then coating in chocolate or candy melts, making it a fun and rewarding project for bakers of all levels.
- Impressive results with minimal effort: The end result is a beautifully presented dessert that looks like it came from a professional bakery, yet it requires minimal effort and time, especially when considering the impact it will have on your guests or loved ones.
Key Ingredients
The foundation of these red velvet cake balls lies in a few key ingredients: red velvet cake mix (or homemade equivalent), cream cheese frosting, and chocolate or candy melts for coating. For those looking to make the cake from scratch, you’ll need flour, sugar, cocoa powder, buttermilk, eggs, and food coloring to achieve the signature red velvet color. The cream cheese frosting can also be made from scratch with cream cheese, butter, vanilla extract, and powdered sugar. Practical substitutions include using different types of milk or vegan alternatives for the buttermilk and opting for dairy-free cream cheese for the frosting.
Instructions
- Step 1: Begin by preparing your red velvet cake according to the package instructions if using a mix, or from scratch if you prefer. Allow the cake to cool completely before proceeding.
- Step 2: Crumb the cooled cake into a large mixing bowl. You want the cake to be well broken down to ensure it mixes evenly with the frosting.
- Step 3: Prepare your cream cheese frosting. If using store-bought, simply follow the package instructions. For homemade frosting, beat the cream cheese and butter until smooth, then gradually add the powdered sugar and vanilla extract until you achieve the desired consistency and taste.
- Step 4: Mix a small amount of the frosting into the crumbled cake until the cake is moist and holds together when formed into balls. Be cautious not to add too much frosting, as this can make the cake balls too wet and difficult to shape.
- Step 5: Use a small cookie scoop or your hands to shape the cake mixture into balls, about 1 inch in diameter. Place the balls onto a baking sheet lined with parchment paper.
- Step 6: Melt your chocolate or candy melts in a double boiler or in the microwave in 30-second increments, stirring between each interval until smooth. Dip the end of a fork or dipping tool into the melted chocolate and then into the cake ball, using the fork to fully coat the cake ball in chocolate. Tap off any excess chocolate by gently tapping the fork against the side of the bowl.
- Step 7: Place the chocolate-covered cake balls onto a fresh piece of parchment paper or a silicone mat. If desired, add sprinkles or other toppings before the chocolate hardens.
- Step 8: Allow the chocolate to set at room temperature or speed up the process by placing the cake balls in the refrigerator for about 10 minutes.
- Step 9: Once the chocolate is set, your red velvet cake balls are ready to serve. They can be arranged on a white plate for a stunning presentation.
Handy Tips
- To ensure your cake balls hold their shape, it’s crucial not to overmix the cake with the frosting. Stop mixing once the cake starts to come together in a cohesive mass.
- For an extra crispy exterior, you can chill the shaped cake balls in the refrigerator for 30 minutes before coating them in chocolate.
- Experiment with different types of chocolate or candy melts for unique flavor combinations. White chocolate, dark chocolate, and colored candy melts can add a fun twist to your cake balls.
Heat Control
When melting chocolate, it’s essential to control the heat to avoid burning the chocolate. Using a double boiler is a safe method, as it gently heats the chocolate. If using the microwave, be sure to stir the chocolate every 30 seconds and stop heating once the chocolate is mostly melted, allowing the residual heat to finish the melting process.
Crunch Factor
The crunch factor in these cake balls comes from the exterior chocolate coating. To achieve a nice crunch, make sure the chocolate is not too hot when coating the cake balls, as this can cause the chocolate to pool at the bottom. Also, avoid over-coating, as this can lead to a thick, less crunchy exterior.
Pro Kitchen Tricks
- For a professional finish, use high-quality chocolate that contains a high cocoa butter content, as it will give a smoother, glossier finish.
- To prevent the cake balls from becoming too dense, don’t overmix the cake and frosting mixture, and handle the cake balls gently when shaping and coating.
- Consider using a candy thermometer when melting sugar or chocolate to achieve the perfect temperature for coating, which is usually between 86°F and 90°F for chocolate.
Storage Tips
- Store your red velvet cake balls in an airtight container in the refrigerator for up to 5 days. Allow them to come to room temperature before serving for the best flavor and texture.
- For longer storage, cake balls can be frozen for up to 2 months. Place them in a single layer in a freezer-safe bag or container to prevent sticking. Thaw frozen cake balls in the refrigerator overnight before serving.
- When storing, it’s best to keep the cake balls away from strong-smelling foods, as they can absorb odors easily.
Gift Packaging Ideas
Red velvet cake balls make a wonderful gift, especially when beautifully packaged. Consider placing a few cake balls in decorative jars or bags and tying them with a ribbon. For a more personalized touch, you can add a gift tag or a small card with the recipe or a personal message. If giving as a holiday gift, themed packaging such as Christmas-themed bags or Easter-themed jars can add to the festive spirit.
Flavor Variations
- Different spices: Adding a pinch of salt or a teaspoon of espresso powder can enhance the flavors of the cake balls.
- Creative toppings: Experiment with various toppings such as chopped nuts, sprinkles, or shredded coconut to add texture and visual appeal.
- Ingredient swaps: For a gluten-free version, use gluten-free flours. You can also substitute the cream cheese frosting with a dairy-free alternative for a vegan version.
Troubleshooting
- Texture problems: If your cake balls are too dense, you may have overmixed the cake and frosting. If they’re too crumbly, you might not have used enough frosting.
- Ingredient replacements: When substituting ingredients, especially in the frosting, be aware that the consistency and flavor may vary. Adjustments might be needed to achieve the right balance.
- Over/undercooking signs: The cake should be completely cool before proceeding. If the chocolate is too hot, it can cause the cake balls to fall apart or the chocolate to pool at the bottom.
FAQs
- Can I freeze it? Yes, you can freeze the cake balls for up to 2 months. It’s best to freeze them before coating with chocolate.
- Is it gluten-free? The traditional recipe is not gluten-free, but you can make it gluten-free by using gluten-free cake mix or flour.
- Can I double the recipe? Yes, you can easily double or triple the recipe if you’re making these cake balls for a large gathering or event. Just be sure to have enough chocolate for coating.
Conclusion
Creating red velvet cake balls on a white plate is a fun and rewarding baking project that combines the classic flavors of red velvet cake with the elegance of bite-sized treats. With their vibrant color and delicious taste, these cake balls are sure to be a hit at any gathering. Don’t be afraid to experiment with different flavors and toppings to make the recipe your own, and consider sharing your creations with friends and family as a thoughtful and unique gift. Whether you’re a seasoned baker or just starting out, this recipe is a great way to explore your creativity in the kitchen and enjoy the process of creating something truly special.