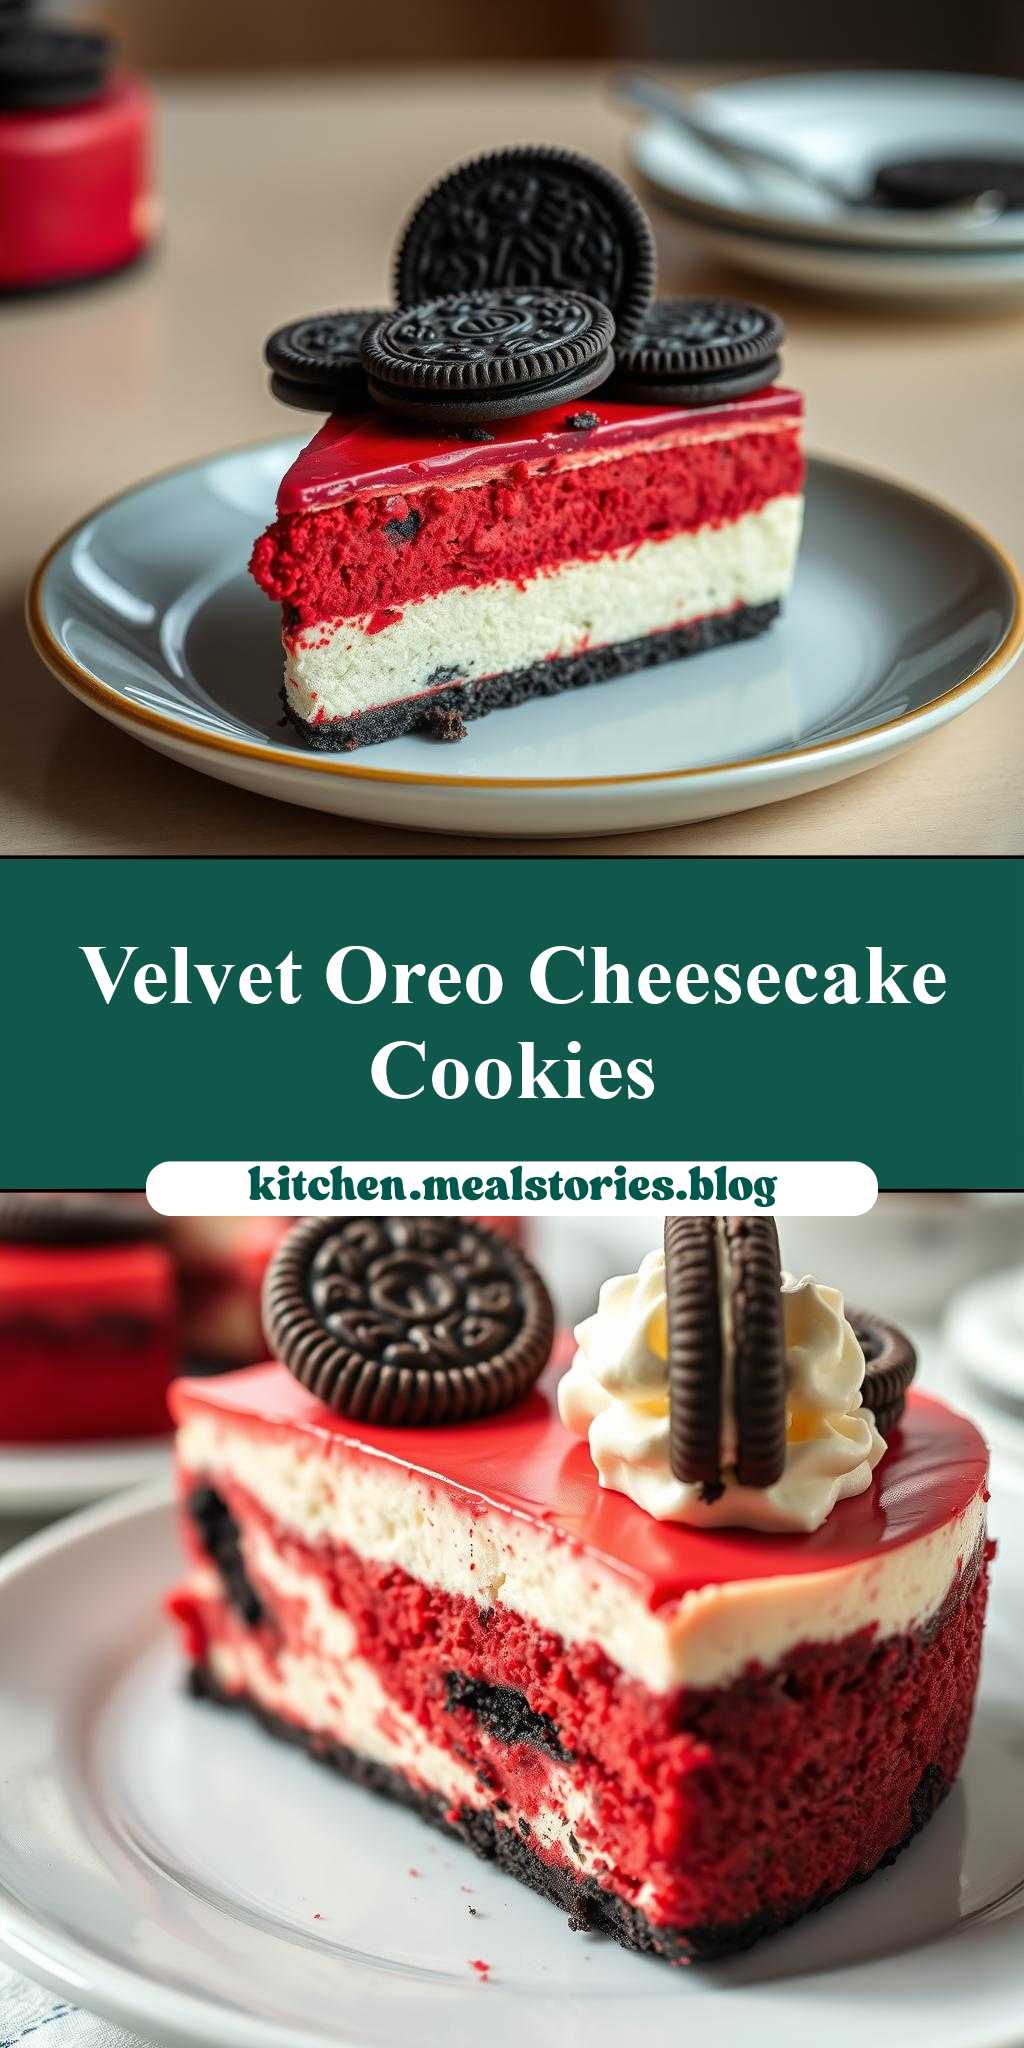
What happens when red velvet and Oreos collide in a cheesecake? Rich cream cheese and melted chocolate come together in this easy homemade dessert featuring a layer of cookies on top, perfect for a family favorite night. Save this idea
red velvet oreo cheesecake with cookies on top
Introduction
Imagine a dessert that combines the richness of cheesecake, the vibrant color and subtle cocoa flavor of red velvet, and the crunch of Oreo cookies, all topped with a layer of freshly baked cookies. This red velvet Oreo cheesecake with cookies on top is not just a dessert, it’s an experience. It’s a creative way to enjoy familiar flavors in a new and exciting way, using everyday ingredients that you might already have in your pantry. The best part? It’s easier to make than you might think, requiring minimal special equipment and no advanced culinary skills. Whether you’re a seasoned baker looking for a new challenge or a beginner seeking to impress, this recipe is perfect for anyone looking to elevate their dessert game.
Why This Works
- Flavor balance and ingredient accessibility: The combination of red velvet, cheesecake, and Oreo offers a unique yet balanced flavor profile that is both familiar and exciting. Most of the ingredients are easily found in any grocery store, making this dessert accessible to everyone.
- Ease of preparation: Despite its impressive appearance, this cheesecake is relatively simple to prepare. It involves basic mixing and baking techniques that don’t require specialized knowledge or equipment.
- Impressive results with minimal effort: The layering of the cheesecake, the Oreo crust, and the topping of freshly baked cookies creates a visually stunning dessert that looks like it came from a professional bakery, all with surprisingly little effort.
Key Ingredients
The main ingredients for this recipe include graham cracker crumbs or Oreo cookies for the crust, cream cheese, eggs, and sugar for the cheesecake, red food coloring and cocoa powder for the red velvet flavor and color, and a batch of your favorite cookie dough for the topping. Practical substitutions can be made for some ingredients, such as using different types of sugar or substituting the cookies on top with another crunchy element like chopped nuts or candy pieces. However, the core ingredients provide the distinctive flavors and textures that make this dessert special.
Instructions
- Step 1: Begin by preparing your crust. If using Oreos, you can simply crush them in a food processor and mix with a bit of melted butter to hold them together. Press this mixture into the bottom of a springform pan. If you prefer a graham cracker crust, follow a similar process with graham cracker crumbs, sugar, and melted butter.
- Step 2: Next, mix your cheesecake batter. Beat the cream cheese until it’s smooth, then add eggs one at a time, followed by the sugar, cocoa powder, and red food coloring. Mix well until all the ingredients are fully incorporated and the batter is smooth.
- Step 3: Pour the cheesecake batter over the prepared crust and bake until the edges are set and the center is just slightly jiggly. Let it cool completely before proceeding to the next step.
- Step 4: For the final touch, bake a batch of your favorite cookies according to the recipe, but slightly underbake them so they remain soft. Once the cheesecake is cooled, arrange these cookies on top. You can use a single type of cookie or mix and match different kinds for a varied texture and flavor.
Handy Tips
- To ensure your cheesecake sets properly, avoid overmixing the batter and make sure your ingredients are at room temperature before starting.
- For a water bath, wrap the outside of the springform pan with foil and place it in a larger pan filled with water to about halfway up the sides of the springform pan. This helps cook the cheesecake more evenly and prevents cracking.
- Don’t overbake the cheesecake or the cookies. The cheesecake should be slightly jiggly in the center, and the cookies should be soft to the touch.
Heat Control
Temperature control is crucial when baking both the cheesecake and the cookies. For the cheesecake, a moderate oven temperature (usually around 325°F) is recommended to prevent the edges from cooking too quickly. For the cookies, follow the temperature and timing instructions from your cookie recipe, but keep an eye on them as they can go from perfectly cooked to burnt quickly.
Crunch Factor
The crunch factor in this dessert comes from the Oreo crust and the cookies on top. To achieve the perfect crunch, make sure the Oreos are finely crushed and well mixed with the melted butter before pressing them into the pan. For the cookies, slightly underbaking them will help retain their texture and provide a nice contrast to the smooth cheesecake.
Pro Kitchen Tricks
- Use a water bath when baking the cheesecake to ensure it cooks evenly and to prevent cracking.
- Let the cheesecake cool completely in the oven with the door ajar after turning off the heat. This gradual cooling helps prevent cracking.
- For an extra-decadent treat, drizzle the top of the cheesecake with chocolate sauce or caramel before adding the cookies.
Storage Tips
- Once the cheesecake is completely cooled and the cookies are arranged on top, it can be refrigerated for up to 3 days. Let it come to room temperature before serving for the best flavor and texture.
- Freezing is also an option, but it’s best to freeze the cheesecake without the cookies on top. When you’re ready to serve, thaw the cheesecake overnight in the fridge, then bake a fresh batch of cookies to place on top.
- For leftovers, store them in an airtight container in the refrigerator. The cookies might lose some of their crunch, but they’ll still be delicious.
Gift Packaging Ideas
This cheesecake makes a wonderful gift, especially for special occasions. Consider packaging it in a decorative tin or on a cake stand wrapped with cellophane and ribbon. If you’re gifting just a slice, place it in a cute cardboard box or a mason jar and tie with a ribbon. Adding a batch of freshly baked cookies on the side, packaged in a decorative bag or container, can make the gift even more special.
Flavor Variations
- Different spices: Try adding a hint of cinnamon or nutmeg to the cheesecake batter for a unique twist.
- Creative toppings: Instead of cookies, top your cheesecake with chopped nuts, candy pieces, or even a fruit compote for a different texture and flavor contrast.
- Ingredient swaps: Use different types of cookies for the crust or topping, or substitute the cream cheese with a vegan alternative for a dairy-free version.
Troubleshooting
- Texture problems: If your cheesecake cracks, it might be due to overmixing the batter or cooling it too quickly. For cookies that spread too much, check your oven temperature and the size of your spoonfuls of dough.
- Ingredient replacements: If you’re missing an ingredient, consider what its role is in the recipe and find a suitable substitute. For example, if you don’t have buttermilk, you can make a substitute by mixing milk with vinegar or lemon juice.
- Over/undercooking signs: Keep an eye on your cheesecake and cookies while they’re baking. The cheesecake should be slightly jiggly in the center, and the cookies should be lightly golden and soft to the touch.
FAQs
- Can I freeze it? Yes, you can freeze the cheesecake, but it’s best to do so without the cookies on top. Freeze, then thaw overnight in the fridge before serving.
- Is it gluten-free? Depending on the cookies used, this dessert might not be gluten-free. Consider using gluten-free cookies or alternatives for the crust and topping.
- Can I double the recipe? Yes, you can double the recipe, but keep in mind that you’ll need a larger pan and possibly longer baking times. Always check the cheesecake and cookies frequently to avoid overcooking.
Conclusion
Making a red velvet Oreo cheesecake with cookies on top is a fun and rewarding baking project that yields impressive results with minimal effort. With its combination of creamy cheesecake, crunchy cookies, and vibrant red velvet color, this dessert is sure to be a hit at any gathering. Feel free to experiment with different flavors and toppings to make it your own, and don’t hesitate to reach out if you have any questions or need further guidance. Happy baking, and enjoy every delicious bite of your creation!